


In this tutorial, we will learn how to install and use the Owncloud with Apache on CentOS 8 operating system.
OwnCloud is a free and open-source package. It provides a platform for managing and sharing files. We can consider it as an alternative to Google Drive, Dropbox, OneDrive, etc. We can access the Owncloud via apps, Desktop, etc.
Read Also: How to Disable SSH Root Login in Linux
Prerequisites
- Root user or other user with sudo access.
- Server required Apache, MariaDB, Multi-PHP versions (7.2, 7.3).
Initial Server Setup
Before starting the installation process we need to update the server and install the required packages.
- To update the Server run the following command.
yum update -y
- Install the vim editor to edit the files.
yum install vim -y
- Install wget package.
yum install wget -y
Apache Installation
We need to access Owncloud on the internet, so we are going to install the Apache package for a webserver.
- To install the Web server package that is Apache, run the following command.
yum install httpd -y
- Verify the package installation with below command.
httpd -v
- Enable the Apache service.
systemctl enable httpd
- Start the Apache service.
systemctl start httpd
- Check the status of the Apache Service
systemctl status httpd
Install MariaDB
MariaDB is one of the most used database package in the Linux operating system.
- To Install the MariaDB run the following command.
sudo dnf install mariadb-server -y
- Enable the MariaDB service
systemctl enable mariadb
- Start the MariaDB service
systemctl start mariadb
- Run the following command to setup the MariaDB.
mysql_secure_installation
It will ask some questions, answer them as follows
Enter current password for root (enter for none)  -  Press Enter
Set root password? [Y/n] - Y
Remove anonymous users? (Y/N) - Y
Disallow root login remotely? (Y/N) - N
Remove test database and access to it? (Y/N) - Y
Reload privilege tables now? (Y/N) - Y
Creating Database
We have already created a separate detailed blog on How to Manage MySQL Databases and Users from the Command-Line. To visit that block click here
- Login in to the MariaDB.
sudo mysql
If it does not work then use the following command.
sudo mysql -u root -p
Enter the password of the MySQL root user.
- Create a new Database.
create database owncloud;
- Create User for the Database.
CREATE USER 'owncloud_user'@'localhost' IDENTIFIED BY 'Strong_password';
- Grant privileges to the MySQL user
GRANT ALL PRIVILEGES ON owncloud.* TO 'owncloud_user'@'localhost';
- Update the privileges.
Flush privileges;
- Exit from the MySQL Server
EXIT;
Installing PHP Modules
ownCloud is a PHP-based application. ownCloud requires PHP to run, you can download any PHP version (7.2, 7.3, 7.4). Recommended PHP version is PHP 7.2. To Install PHP Versions Click on here
Make sure that you have enabled the PHP version which you have installed.
Downloading OwnCloud
At this time the latest version of ownCloud is 10.7. To download the latest version visit the Main Site of ownCloud.
- We will download the ownCloud 10.7, Owncloud Versions are keep on updating so download the latest version from the browser.
wget https://download.owncloud.org/community/owncloud-complete-20210326.tar.bz2
- Create the directory for the document root.
mkdir -p /var/www/
- Extract the archive file to the document root. By default, we consider
/var/wwwas document root.
sudo tar xvf owncloud-complete-20210326.tar.bz2 -C /var/www/
Note:- sometimes the above command will not work due to the change in the file name. Mention the exact file name which we have downloaded just after the sudo tar jxf.
- Change the Ownership of the directory.
sudo chown -R apache.apache /var/www/owncloud
- Change the access permissions
chmod -R 755 /var/www/owncloud
- If SELinux is running on your system, you’ll need to update the SELinux security context:
sudo chcon -Rt httpd_sys_rw_content_t /var/www/owncloud
Configuring Apache.
To run Owncloud on the Domain, we need to create the Apache configuration file.
- Create the Apache configuration file, To create configuration run the following command.
sudo vim /etc/httpd/conf.d/owncloud.conf
- Add the following content in the file.
<VirtualHost *:80>
ServerAdmin linuxpanda.com
     DocumentRoot /var/www/owncloud/
     ServerName linuxpanda.com
     ServerAlias www.linuxpanda.com

<Directory /var/www/owncloud/>
  Options +FollowSymlinks
  AllowOverride All

 <IfModule mod_dav.c>
  Dav off
 </IfModule>

 SetEnv HOME /var/www/owncloud
 SetEnv HTTP_HOME /var/www/owncloud

</Directory>
</VirtualHost>
- Restart the Apache service.
sudo systemctl restart httpd
Installing ownCloud
After creating all the configurations, now access the Owncloud from the browser.
- Open the browser and Enter the domain in the URL section.
https://domain_name
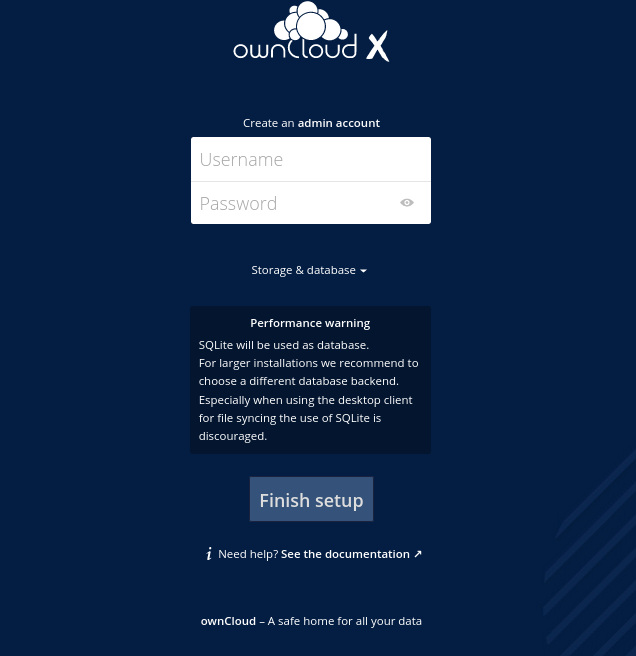
Enter the new username and password.
- Now Click on Storage & Database.
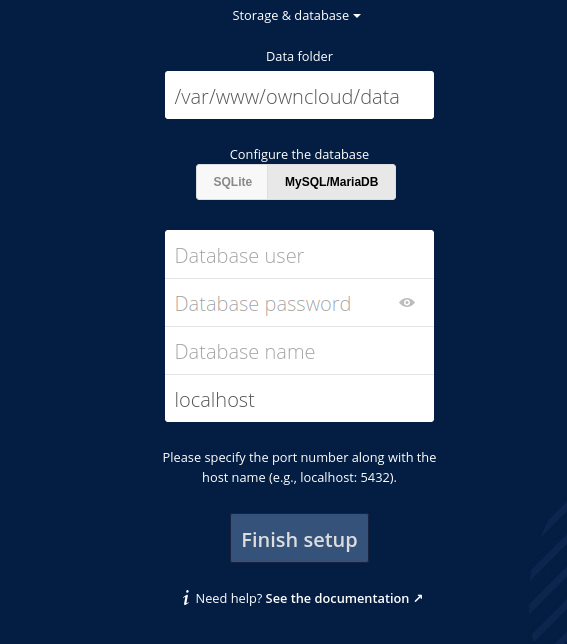
Data Folder – Leave as default. If you have created the document root at another path then Enter the path where you have stored Owncloud’s files and directories.Configure the database – Click on the MySQL/MariaDB option.Database User – Enter the name of the MySQL database user.Database Password – Put the password of the MySQL database User.Database Name – Enter the Database name which you have created.
- Click on
Finish setup. - After finishing the setup you will see the login Page as shown in below image.
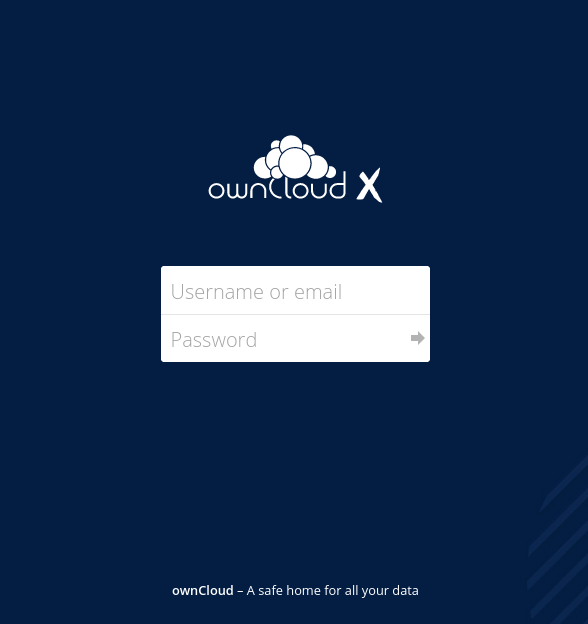
Enter the Username and Password which you have created earlier. Now press Enter button.
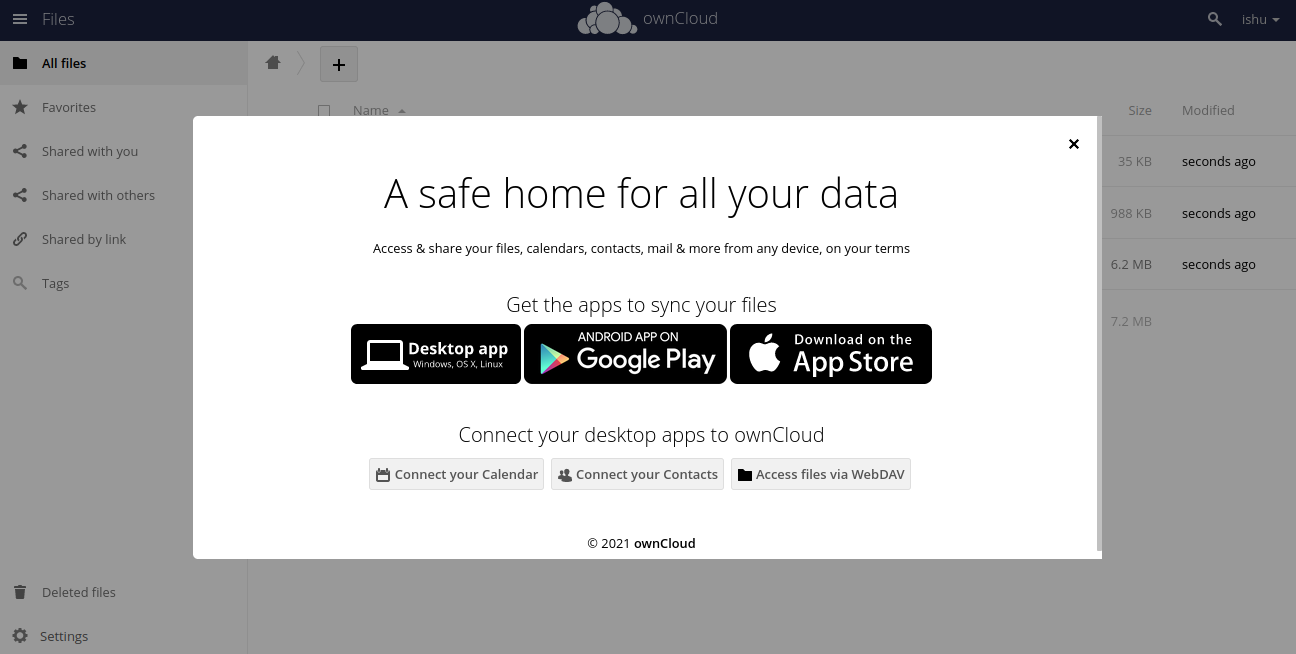
- You have successfully setup the Owncloud.
Conclusion
In this tutorial, we have learned how to install and set the Owncloud on CentOS 8 operating system. If you guys face any issue then mentioned your issue in the comment section.
If you want detailed Information about the Owncloud then you can visit the ownCloud home page.