


Introduction
In this tutorial, we will learn how to install MySQL 5.7 and 8.0 in Ubuntu 20.04.
MySQL is an open-source relational database server tool for Linux operating systems. It is used worldwide in web-based technology. MySQL is an important part of LAMP. MySQL is used to create and store the information in the Database in the form of tables (rows and columns). Mostly used Database servers are MySQL and MariaDB. If you want to install MariaDB.
Prerequisites
- An Ubuntu 20.04 running system
- Access of Root User or a User with sudo privileges.
Remove old MySQL Repositories for install MySQL 5.7 and 8.0 in Ubuntu 20.04.
Before, starting the installation process removes the default MySQL repositories.
To remove the default Repositories, follow the below command:
sudo apt-get purge mysql-apt-config
Install the MySQL in Ubuntu 20.04
Choose the MySQL version as per your requirement. We cannot install multiple MySQL in Linux operating system. So, choose the MySQL version carefully as per your website requirement.
Install MySQL 5.7
- Update the Server.
sudo apt update
- Install wget package.
sudo apt install wget -y
- Download the MySQL 5.7 Repositories
wget https://dev.mysql.com/get/mysql-apt-config_0.8.12-1_all.deb
- Enable the Repositories.
sudo dpkg -i mysql-apt-config_0.8.12-1_all.deb
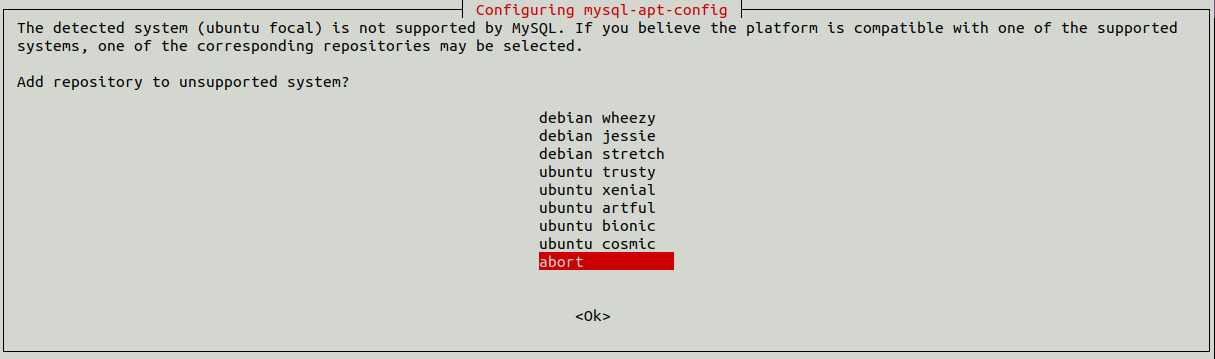
- Choose the Ubuntu Bionic option.
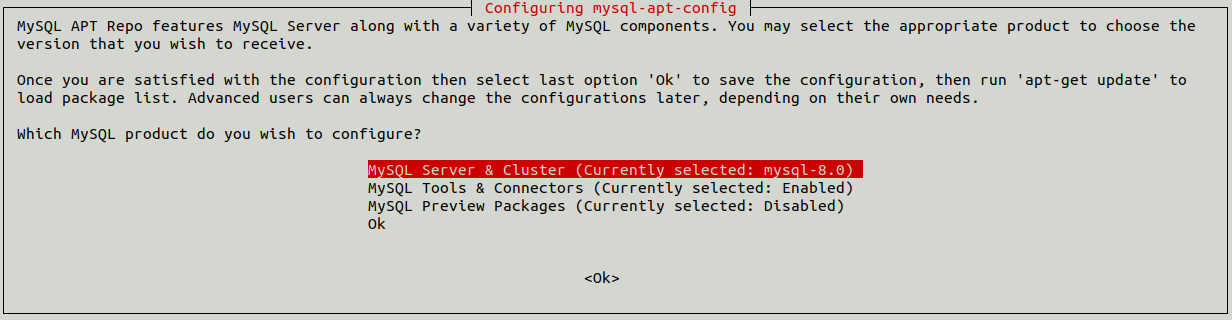
- Choose the MySQL 5.7 version, then select
OKand press Enter.

- Now we need to add the security key for the Repository.
sudo apt-key adv --keyserver keyserver.ubuntu.com --recv-keys 467B942D3A79BD29
- Update the MySQL Repository.
sudo apt-get update
- Check the MySQL 5.7 successfully added in repository or not.
sudo apt-cache policy mysql-server
- Install the MySQL 5.7:
sudo apt install -f mysql-client=5.7.32-1ubuntu18.04 mysql-community-server=5.7.32-1ubuntu18.04 mysql-server=5.7.32-1ubuntu18.04 -y
If it shows Error then check the MySQL version from the output shown by the above command.
- Set a very strong password for MySQL server. You can use Random Password Generator to generate a strong password. If you use a normal password then after installation it will not allow you to login. It will show an error
Access denied for user 'root'@'localhost'

Read Also: How to Add and Delete Users on CentOS 8
Install MySQL 8.0
- Update the Server’s resources:
sudo apt update -y
- Install wget package on the server:
sudo apt install wget -y
- Download the MySQL 8.0 Repositories file.
wget https://dev.mysql.com/get/mysql-apt-config_0.8.12-1_all.deb
- Enable the Repositories for the MySQL installation:
sudo dpkg -i mysql-apt-config_0.8.12-1_all.deb
- Choose the Ubuntu Bionic option in the Dialog Box.

- Choose the MySQL 8.0 version, then select
OKand press the Enter Button.
- Now we need to add the security key for the Repository.
sudo apt-key adv --keyserver keyserver.ubuntu.com --recv-keys 467B942D3A79BD29
- Again Update the MySQL Repository.
sudo apt-get update
- Run the below command to start the installation process of the MySQL 8.0 server:
apt-get install mysql-server
- Set a very strong password for MySQL server. You can use Random Password Generator to generate a strong password. If you use a normal password then after installation it will not allow you to login. It will show an error
Access denied for user 'root'@'localhost'

Start the MySQL Service
- Enable the MySQL service. It helps the server to automatically restart the MySQL service in the case of Server reboot (restart).
systemctl enable mysql
- Restart the MySQL service
systemctl restart mysql
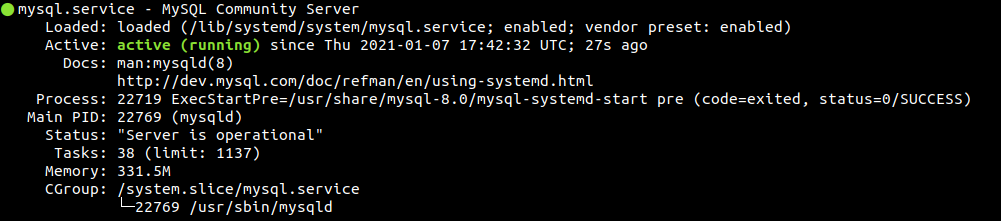
- Check the status of MySQL service
systemctl status mysql
Secure MySQL Server
You have to perform some tasks to secure the MySQL server.
- Run the below command to secure the MySQL server:
mysql_secure_installation
- It will ask you some questions, answer them as per your requirement.

Enter your current MySQL root password.

If you want to use this component, Type y and press Enter. It is used to check the strength of your password.

If you want to set a new password, you can set a strong password from here. Password must be very strong. Use Random Password Generator to generate a strong password.

To remove the Anonymous User, type yand press Enter key.

If you want to disallow Remote access on the server then type y and press Enter button.

To remove the test databases, type y and press Enter button.

Enter y and press Enter button to save the changes.
Remove the MySQL Server
If you want to remove the MySQL server from Ubuntu 20.04 then you have to follow the below commands:
- To remove the MySQL server.
sudo apt-get remove --purge mysql-server mysql-client mysql-common
Enter Y to continue.
- To remove all the Directories of MySQL. Select
Yesand Press Enter button.

- Run the below commands to completely clean remaining data related to MySQL.
sudo apt-get remove --purge mysql*
sudo apt-get autoclean
sudo apt-get autoremove
Conclusion
In this tutorial, we have learned how we can install and remove the different versions of the MySQL server with the help of Repositories in Ubuntu 20.04. MySQL is one of the most popular packages used to manage the database.
If you guys have any queries related to this tutorial, let me know in the comments.