Create a Windows EC2 instance in AWS
AWS stands for Amazon Web Services. AWS is a very broad cloud platform that offers more than 200 services from data centers globally. It provides scalable and cost-effective cloud computing solutions.
Advantages of AWS Services
- Security
- Global Availability
- Scalability and Flexibility
- Little Investment
AWS Services
- Security tools
- Developer tools
- Management tools
- Compute service
- Networking and delivery of content
- Database
- Storage
Prerequisite
- Need a verified AWS account
- The minimum requirement for a Windows instance is 2 GB RAM and 30 GB SSD.
Note: For the AWS free tier, AWS offers 1 GB of RAM and 30 GB of SSD (gp2 EBS volume) free for 12 months. We can launch the Windows instance with 1 GB RAM, but it will offer poor performance. For better performance, you need to choose at least 2 GB RAM for the windows instance.
Guide to Create a Windows EC2 instance in AWS
Read Also: How to Setup Free SSL Certificate (Lets-encrypt-SSL) for Apache on Ubuntu 20.04
Launch Windows Instance
- Click on the AWS login console to log into the AWS account.
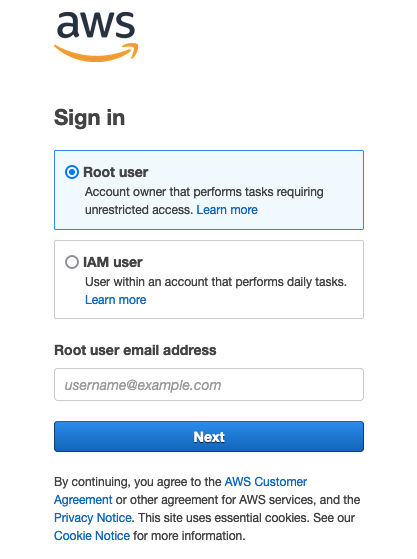
Now enter the Login Mail and Password.
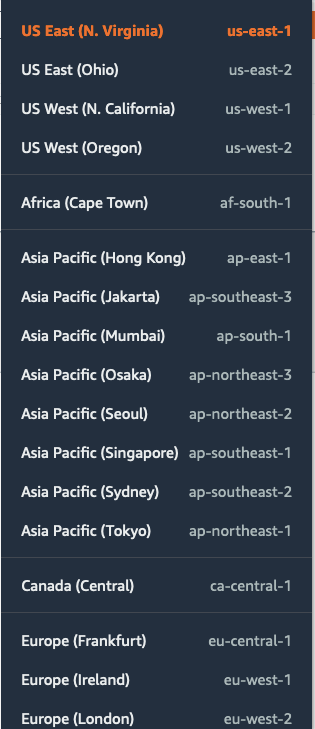
- After login, select the Region in which you want to launch the instance.

- The list of available regions in AWS are as follows. Choose the region as per your requirement. For this tutorial, we are selecting the Asia Pacific (Mumbai) region.
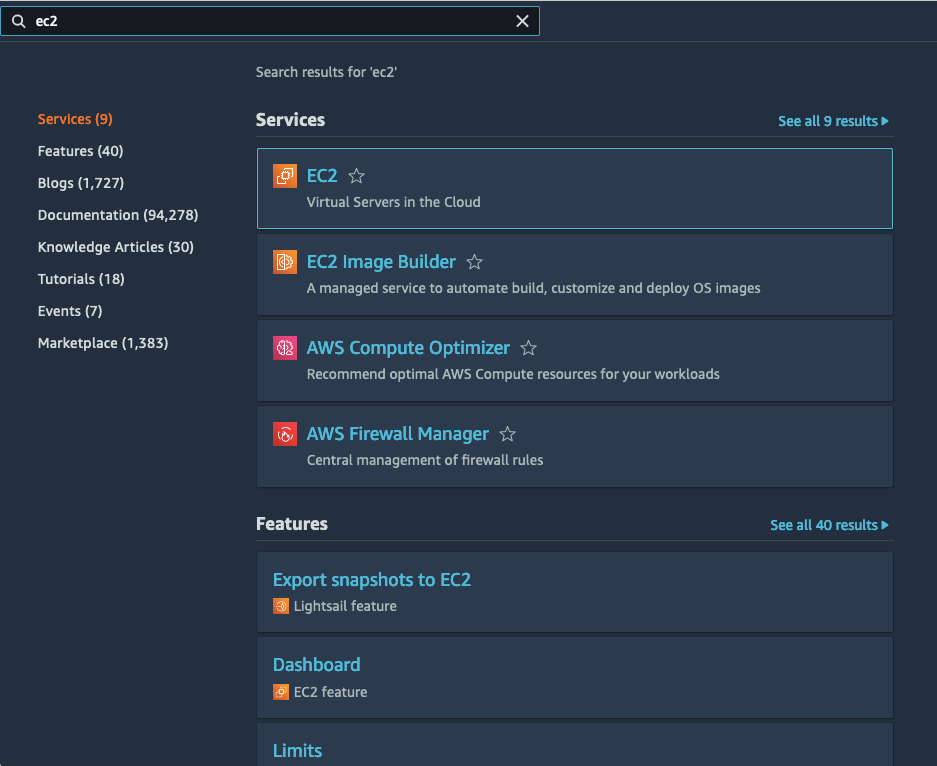
- Now, click on the search bar and search for the EC2 service. Now Click on the EC2 service.
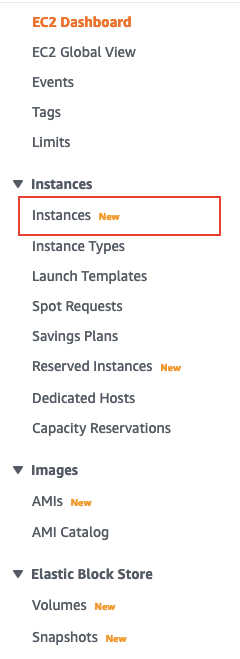
- Click on Instances from the list of options present on the left side of the AWS console.
- Click on Launch Instances button.

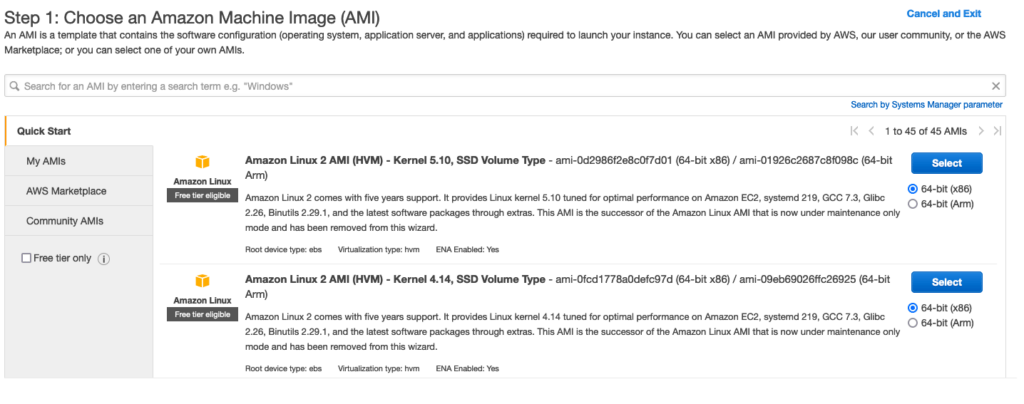
- Search for the Windows Amazon Machine Image (AMI) from the search bar.
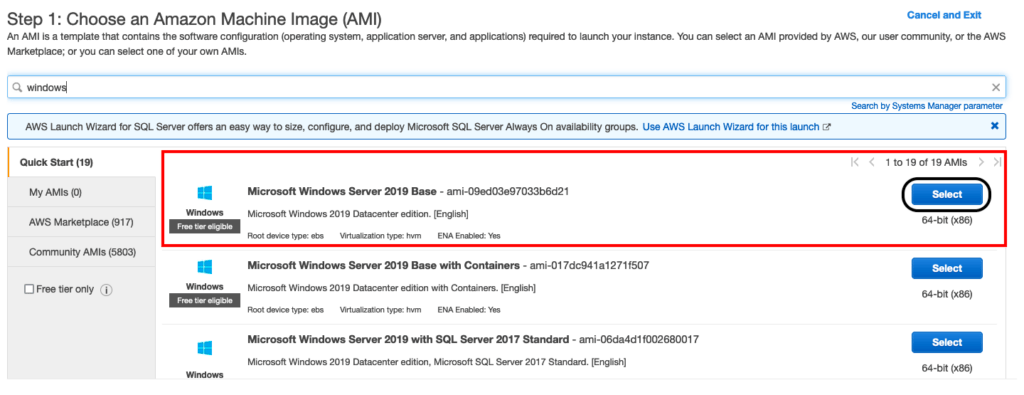
- Select the “Microsoft Windows Server 2019 Base” image and click on the Select button.
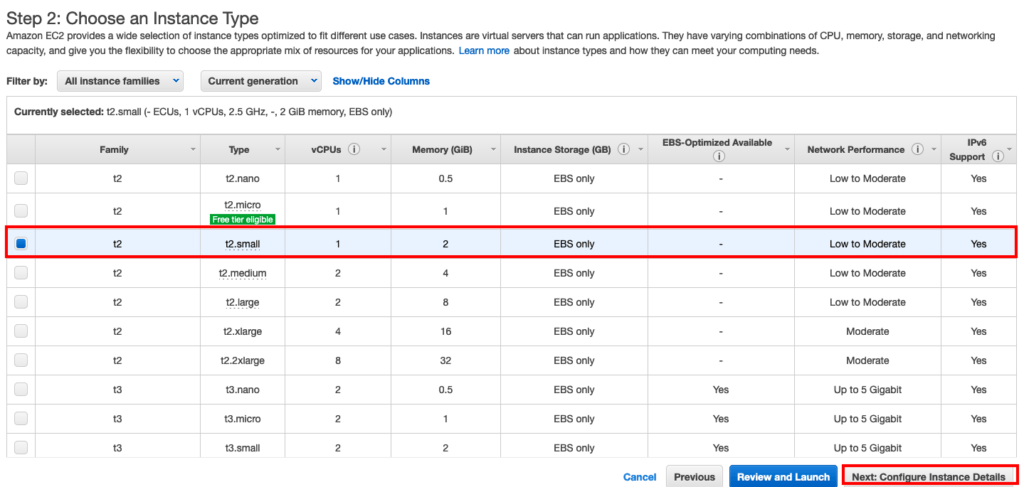
- Select t2.small (2 GB RAM and 1 vCPU), and then click on the Next button.
You can also choose the RAM and vCPU according to your needs, however you will be charged for the RAM and vCPU which you have selected for your windows instance. For t2.small (2 GB RAM and 1 vCPU) AWS will charge $19.00 per month.
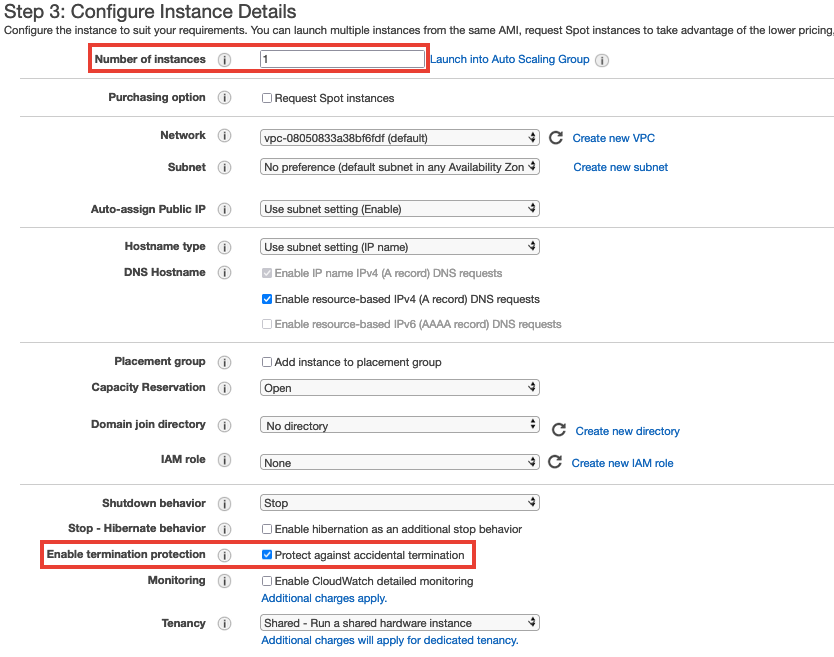
- If you want to launch multiple instances with the same configuration, then enter number of instances in “Number of instances“. By default, the value of “Number of instances” will be 1. Check mark the “Enable termination protection” option to protect your instance from accidental termination. Rest all the setting will be on default. Now, click on the Next button.
- By default, AWS choose 30 GB of free SSD(gp2). If you want to increase the size of SSD, then you need to pay $1 per 10 GB for every month. Check mark the “Delete on Termination” option to avoid extra charges for the Volume after the termination of the instance. Click on Next button.

- Leave the Add Tags section with the default settings and click on the Next button.
- In Configure Security Group section, we need to allow the Port for HTTP(80) and HTTPS(443) as follows. Rest all the setting will be default. Now, click on Review and Launch button.

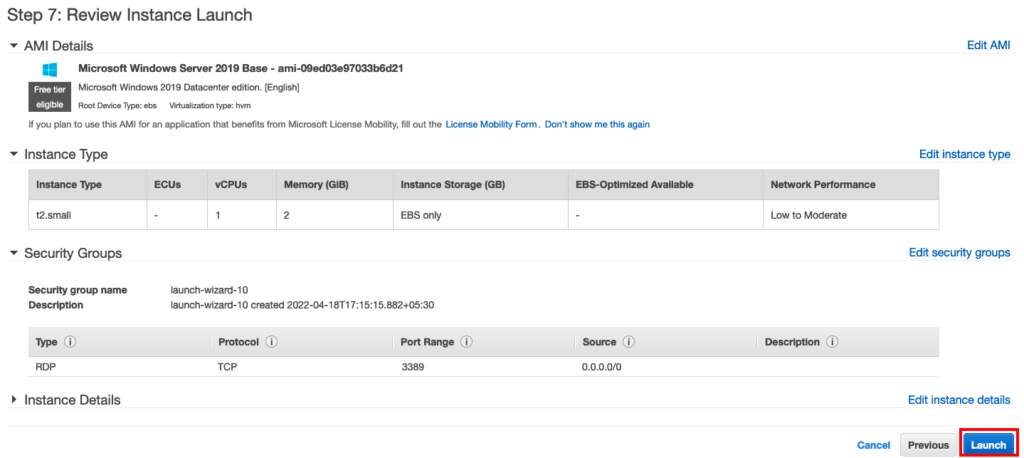
- In the review section, you can cross-check all the options which you have selected are as per your requirement. Now, click on the Launch button to launch the instance.
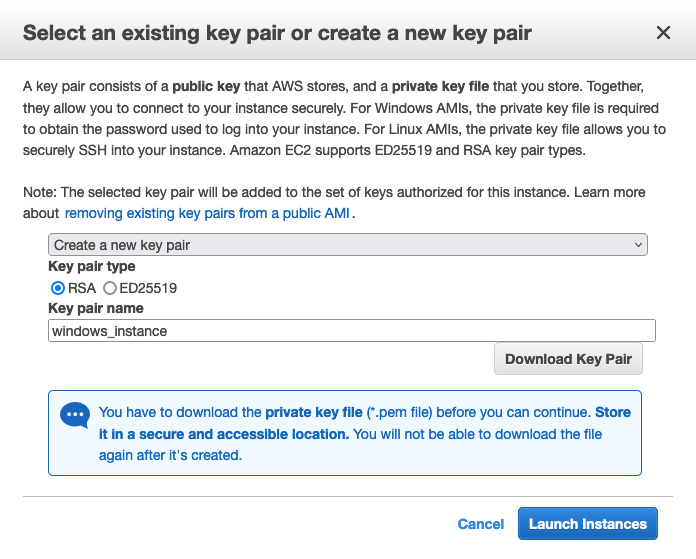
- Configure the SSH key to log into the server. Select the Create a new key pair to create a new key. Enter the name for the key, then click on the Download Key Pair button to download the key. Now, click on the Launch Instances button.
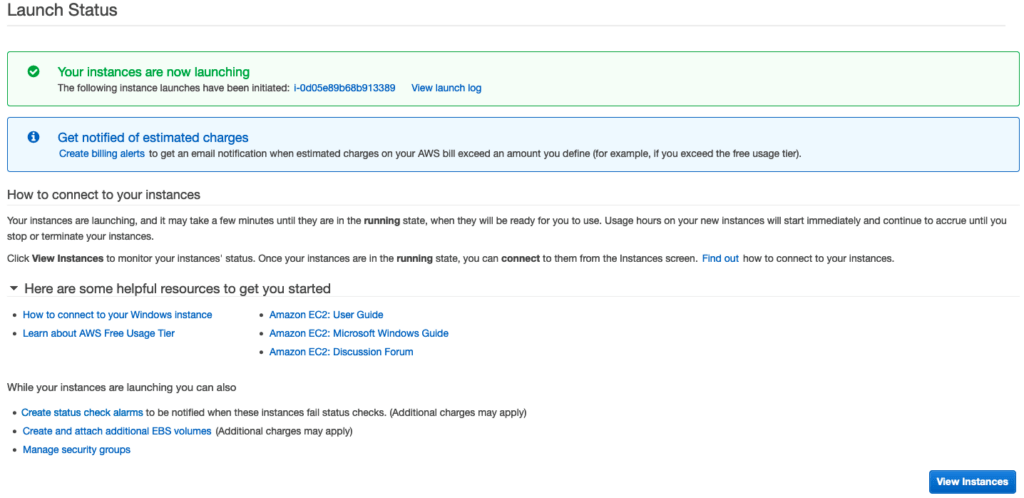
- After launching the Windows instance, you will get the output like this. Click on the View Instance to check the instance.
- As you can see, we have successfully launched the windows instance.

Allocate and Associate the Elastic IP to Windows Instance
When we launch a new Windows EC2 Instance, our instance will be assigned with a new public IP address. However, because this IP address is not static, it will change, or a new IP address will be issued to your instance when certain activities are performed on it, such as restarting the instance. To avoid this, we need to set a static IP address with the windows instance.
Allocate the Elastic IP Address
- Click on the Elastic IPs option available under the Network & Security section. You can find the Network & Security section from the list available on the left side of Ec2 Dashboard.

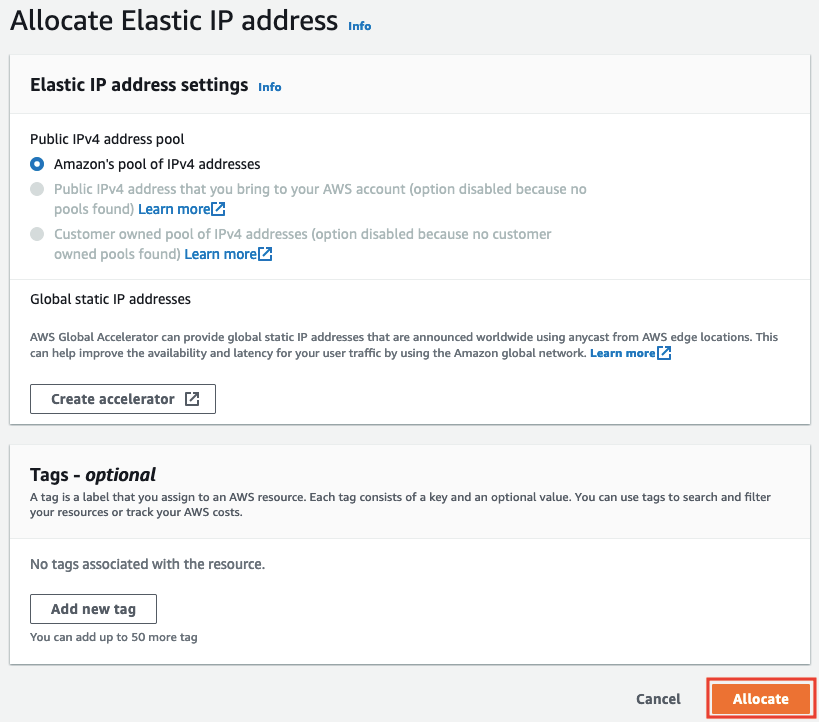
- Click on Allocate button.
Associate the Elastic IP Address
Now we have an Elastic IP Address, and we need to assign it to our windows instance.
- Click on the Actions menu and select the Associate Elastic IP Address option.

- Now select the Windows instance from the Instance option and then click on the Associate button.
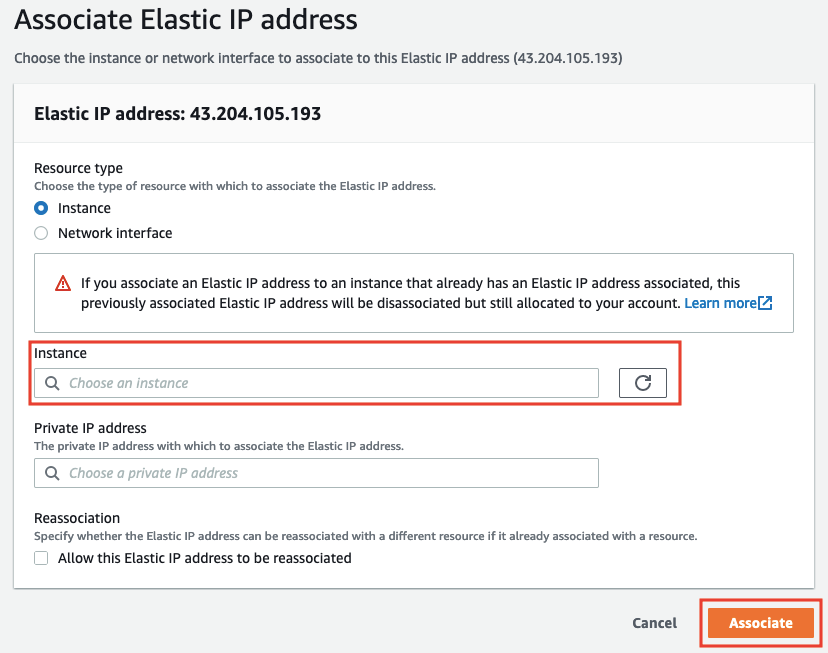
We have successfully assigned a static IP address on the windows instance. Now, the IP will not change if we reboot the server.
Connect to Windows instance
To connect to your Windows instance, follow the below steps.
- Select the instance and click on the Connect button.

- Select the RDP client and then click on the Download remote desktop file to download the RDP client file.
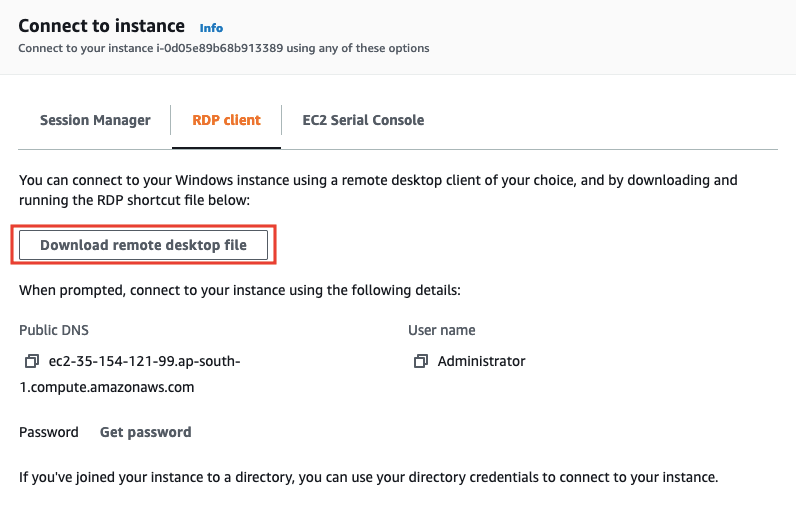
- Now click on the Get password to get the server Administrator password. Click on browse and upload your server ssh key, then click on Decrypt password button.
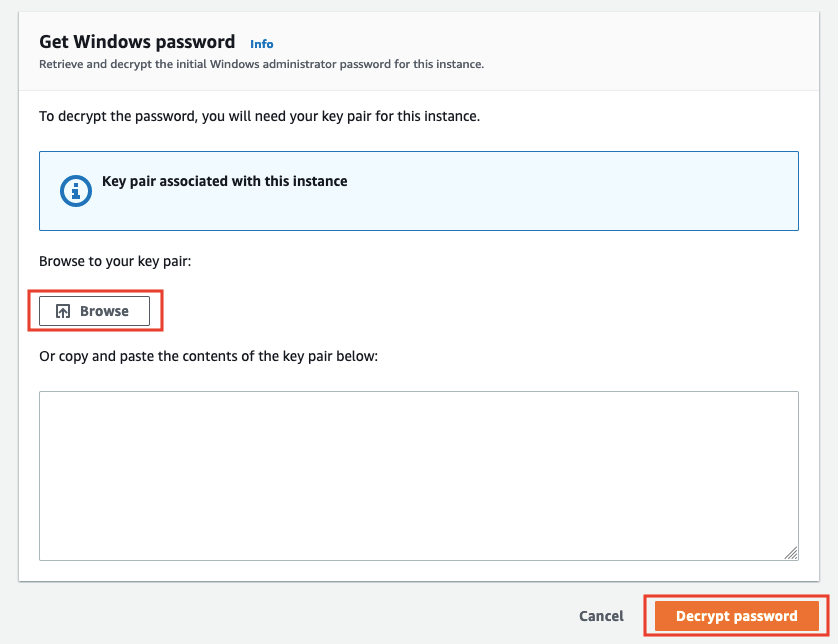
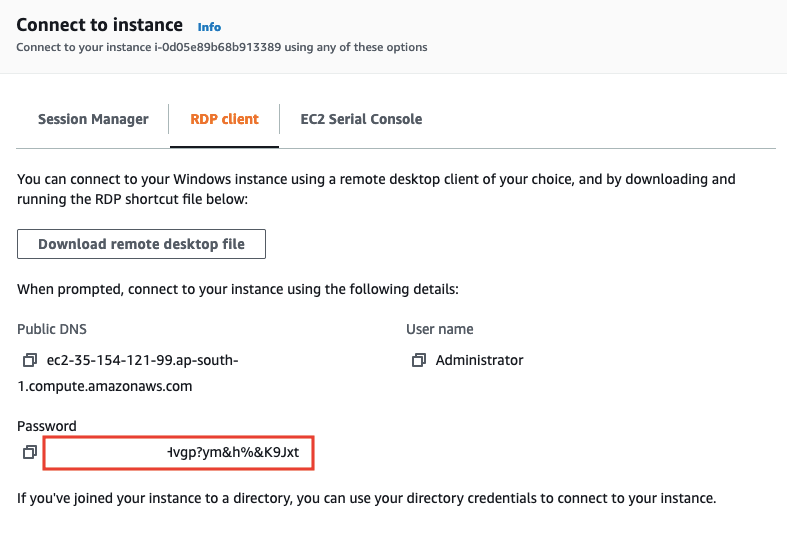
- You have successfully got the server Administrator password.
For macOS
To connect the Windows instance on macOS, you need to install the Microsoft Remote Desktop app. You can install this app from the App store.
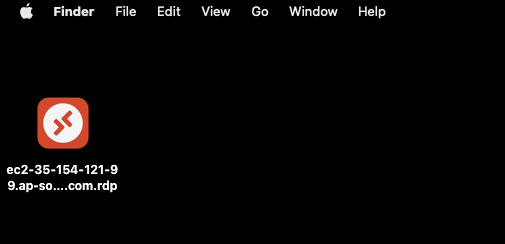
- To connect the windows instance, simply double-click on RDP client file which you have downloaded earlier. The RDP client file will look like this.
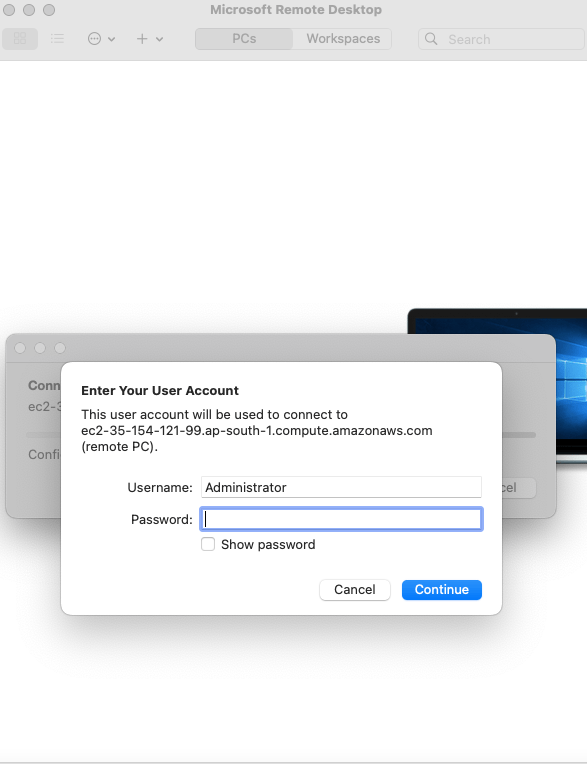
- Now enter the server Administrator password, which we have obtained in the above commands.
For Windows
To connect the Windows instance on the Windows system, we will use Remote Desktop Connection software, which is inbuilt in windows.
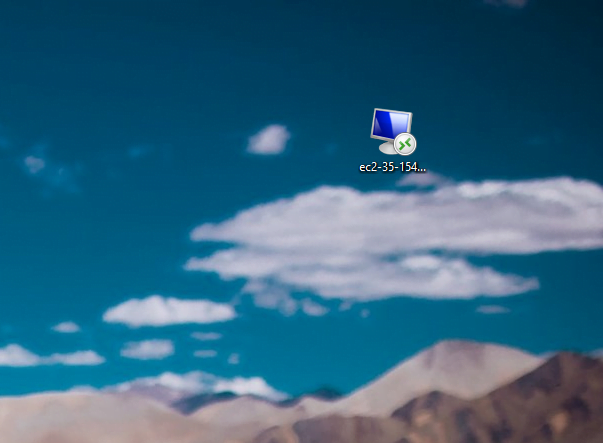
- Double-click on RDP client file to connect the windows instance, which you have downloaded earlier. The RDP client file will look like this.
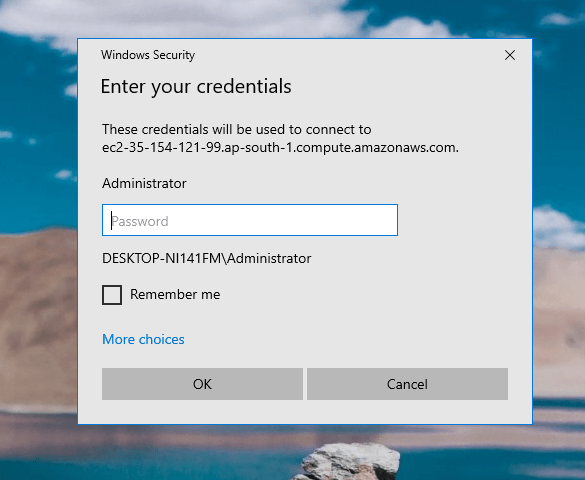
- Enter the server Administrator password, which we have obtained in the earlier.
Conclusion
In this tutorial, we have learned about AWS, its advantages, services, and how to Create a Windows EC2 instance in the AWS console. EC2 is one of the famous and mostly used services of Amazon web service.
If you guys have any queries related to this tutorial, then let me know in the comments section.







Leave a Reply