


Maldet is one of the popular and most used open-source antiviruses in the Linux operating system and is used to scan malware on servers. Learn How To Install Maldet on Ubuntu 20.04
Malware is a type of virus that is designed to damage and theft the server’s important data. On many panels, maldet can easily be installed in the form of extension.
Prerequisite
- Ubuntu 20.04 Server.
- Root access or Other User with Sudo privileges.
Setup the server for Install Maldet on Ubuntu
Before the installation, we need to setup the server and install the required packages.
- Update and upgrade the server.
apt update -y && apt upgrade -y
- Install the wget package.
apt install wget -y
Read Also: How to Install PHP 8.0 on Ubuntu 18.04 and 20.04
Install Maldet
Run the following steps to install the Maldet on the server.
- Change the current working directory.
cd /opt/
- Download the latest Maldet package.
wget http://www.rfxn.com/downloads/maldetect-current.tar.gz
- Uncompress the tar file.
tar xfz maldetect-current.tar.gz
- To check the tar file successfully uncompressed or not, run the following command.
ls -l
You will see the output like this.

- Now the change the current working directory to the extracted file .
cd maldetect-1.6.4
- Run the installation script.
./install.sh
Maldet Syntax
The Syntax of Maldet is as follows:
maldet [OPTION] [Directory Path]
Explanation of Maldet options:
- -a (–scan-all PATH) : Use this option when need to scan all files in the path.
- -u (–update) : This options update malware detection signature from rfxn.com.
- -b (–background) : To run the task in background use this option.
- -k (–kill) – Use this option to terminate inotify monitoring services.
- -d (–update-ver) : It will update the Maldet version from rfxn.com.
- -m (–monitor USERS|PATHS|FILE) : It will Run maldet with inotify kernel level file create/modify monitoring.
- -r (–scan-recent PATH DAYS) : Use this option to Scan the files which are created/modified in the last X days (default: 7d, wildcard: ?)
- -l (–log) : To check the Maldet log file events.
- -c (–checkout FILE) : This option to Upload suspected malware to rfxn.com for review & hashing into signatures
- -e (–report SCAN ID email) : To View the scan report of most recent scan or of a specific SCAN ID and optionally e-mail the report to a supplied e-mail address. Example – maldet –report, maldet –report list, maldet –report 874510-157434.745635, maldet –report SCAN ID [email protected]
- -s (–restore FILE|SCAN ID) – This option is used to Restore the file from quarantine queue to original path or restore all items from a specific SCAN ID, maldet –restore /usr/local/maldetect/quarantine/config.php.23754, maldet –restore 874510-157434.745635
- -p (–purge) : To clear logs, session and temporary data.
- -U (–user USER) : Option is to set execution under specified user, ideal for restoring from user quarantine or to view user reports. Example – maldet –user nobody –report, maldet –user nobody –restore 050910-1534.21135.
- -q (–quarantine SCAN ID) : Option will quarantine all malware from the report.
- -n (–clean SCAN ID) : This will clean & restore malware hits from the report.
Configure the Maldet
We have to configure the Maldet for better performance.
- Open and edit the configuration file which is present at /usr/local/maldetect/conf.maldet
vim /usr/local/maldetect/conf.maldet
Find and update the configuration file as mentioned as shown below.
 # To enable the email notification.
 email_alert="1"

 # Specify the email address on which you want to receive an email notification.
 email_addr="[email protected]"

 # Enable the LMD signature autoupdate.
 autoupdate_signatures="1"

 # Enable the automatic updates of the LMD installation.
 autoupdate_version="1"

 # Enable the daily automatic scanning.
 cron_daily_scan="1"

 # Allows non-root users to perform scans.
 scan_user_access="1"

 #move hits to quarantine & alert
 quarantine_hits="1"

 # Clean string based malware injections.
 quarantine_clean="0"
Save the changes and exit from the file.
Scan Directory with Maldet
- Update the malware detection signature.
maldet -u
- Check for the Maldet version update.
maldet -d
- Scan the home directory. You can scan any directory just mentioned the path after the
-aattribute.
maldet -a /home/
After executing the above command you will get a report ID.
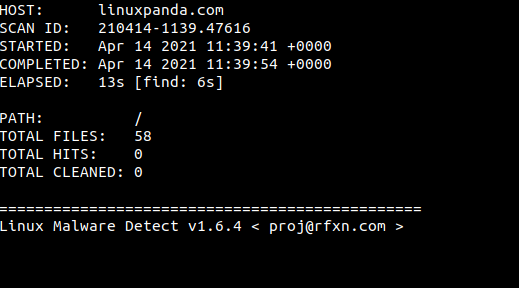
- To see the Maldet Report run the following command.
maldet --report 210414-1139.47616
- To quarantine the infected files with the help of scanned report, run the following command.
maldet -q 210414-1139.47616
If you wish to remove or clean the malware from a previously scanned report, follow the below command.
- To remove or clean the infected files from a previous scanned report.
maldet --clean 210414-1139.47616
Scan Directory with Maldet in Background
If the size of the file or directory is large then we have to run the maldet scan process in the background.
- To scan the files or directories in the background simple run the maldet command with
-battribute.
For Example, in the below command we will scan the / means root directory in the background.
maldet -b -a /
You will the output as shown in the below image.

- Check the status of the background scan, simply run the following command.
tail -f /usr/local/maldetect/logs/event_log
You will see the output screen like this, at the end, you will see a –report ID if the scan is completed.

To see the Report run the following command with Report ID:
maldet --report 210414-1200.49645
Clear Logs and Temporary data
- To clear logs, quarantine queue, session and temporary data from the previous scan run the following command:
maldet -p
- You will see the following output screen:

- To verify the log data is removed or not, run the following command:
maldet -l
Conclusion
In this tutorial, we have learned how to Install Maldet on Ubuntu with its different attributes. Maldet is one of the most popular antivirus used in the Linux operating system.
If you guys face any issues then you can easily contact me through the comment section. Just mentioned your query in the comment section.