


Fastpanel is one of the most popular and most used panels all over the world. Fastpanel is a simple and user-friendly panel. Through this panel, we can easily manage the website, mails, database, backup, and analyze the traffic. We can assign a website to a single user. For security, we can use two-factor authentication. install Fastpanel on CentOS 7.
Prerequisites
- Access of Root user or Other user with sudo privileges.
- Fresh Server with any of the Supported Operating System Debian 8, Debian 9, Debian 10, Ubuntu 18.04, Ubuntu 20.04 or CentOS 7.
- Required 1 GB RAM and 5 GB Free space.
Pre-required Packages
Before starting the installation process, we need to install some pre-required packages.
- Install wget package.
yum install wget -y
- To install Vim editor to edit the files.
yum install vim -y
- Install the screen package.
yum install screen -y
Set up the Server
In this blog, we are using a fresh CentOS 7 server for the installation of Fastpanel. Before starting the installation process, we need to update the server, so that the script can download the latest packages.
- Update the server.
yum update -y
- Set the hostname of the server. Simple replace the
NEW_HOSTNAMEwith your hostname.
sudo hostnamectl set-hostname NEW_HOSTNAME
- Check the status of SELinux
sestatus
Check the SElinux, If enabled, then disable it. using the below setenforce command. otherwise move to the steps for Create the swap file.
- To temporarily disable the SELinux, issue the below command.
sudo setenforce 0
Create the Swap File
The swap file is one of the best methods used at the time when the amount of physical RAM is full. At that time, a swap file was used as temporary RAM.
- Create the Swap File for the better performance. Swap file will always be double of the RAM. Check the RAM first.
free -h
- Allocate the Space for the Swap file. Change the value of
countas per your server’s RAM. In this case the Server’s RAM is 1 GB, so we have created a Swap File of 2048 MB.
sudo dd if=/dev/zero of=/swapfile count=2048 bs=1M
- Change the Ownership of the Swap file.
sudo chown root:root /swapfile
- Change the permission of the file so that only Root user can access the file.
sudo chmod 0600 /swapfile
- Use the
mkswapcommand to set up the file as swap area.
sudo mkswap /swapfile
- Run the command to enable the swap.
sudo swapon /swapfile
- Edit the
/etc/fstabfile.
vim /etc/fstab
- Add the following content in the file and then save and exit from the file.
/swapfile swap swap defaults 0 0
- Check the configuration of fstab file is correct or not. If the configuration is error free then it will not show any error.
mount -a
- Check the Swap is perfectly created or not.
sudo swapon -s
- For the better utilization of swap, we also adjust the swappiness value. Check the value of swappiness.
cat /proc/sys/vm/swappiness
- Set the swappiness value to 10.
sudo sysctl vm.swappiness=10
- After reboot, Swappiness value will be set to default. To save the swappiness value permanently. Edit the
/etc/sysctl.conffile.
vim /etc/sysctl.conf
- Add the following content in the file.
vm.swappiness=10
Install the Fastpanel
After creating the Swap file, we need to download the script to download and install the Fastpanel on the server. The installation process can take 10 to 15 minutes, so run the script on the screen.
- To create a screen, run the following command.
screen
- After entering the screen, run the following command to download and run the installation script of Fastpanel.
wget http://repo.fastpanel.direct/install_fastpanel.sh -O - | bash -
Wait for the Script to complete the installation process.
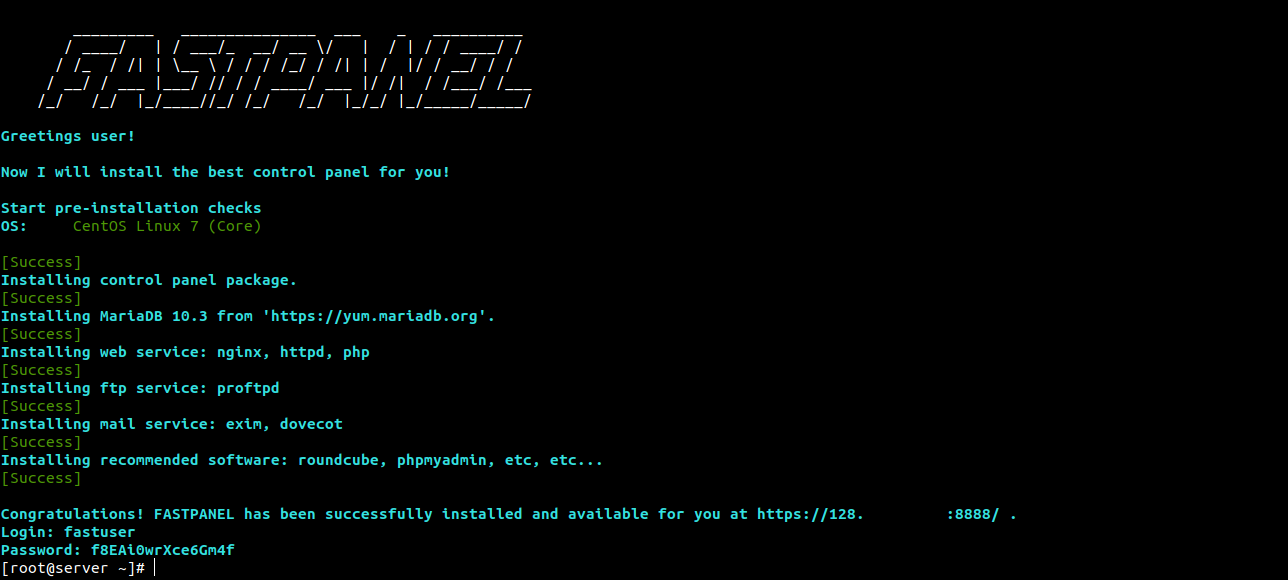
Note:- Save the Login Username and Password. Later we will use these details to log into the Fastpanel.
- After installation to access the Fastpanel simply open the browser and add the following content in the URL section. Replace the
IP_Addressfrom the below command with your server’s IP address.
https://IP_Address:8888/
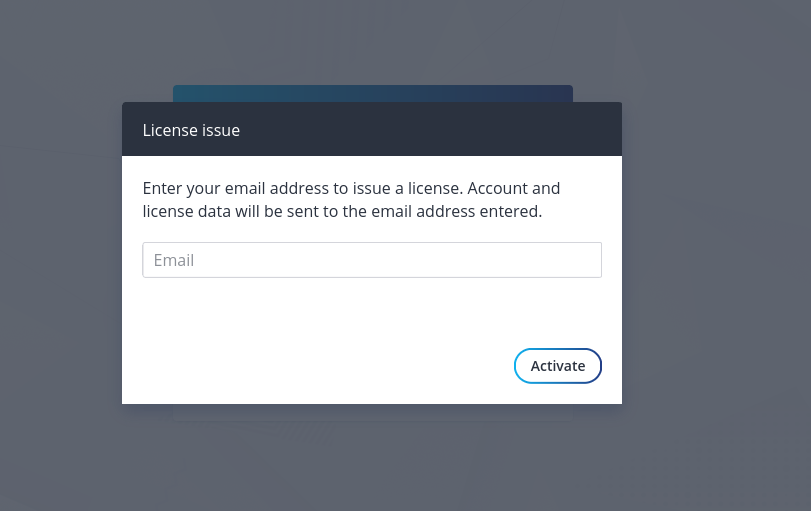
- It will ask for the email address for the licence. Enter your Email address and click on
Activatebutton.
- Open your Emails and check mails sent by the Fastpanel. You will get the Mail ID and password to login on the Official website of the Fastpanel to create a new licence.
- After Logging on the Website you will see the following output.
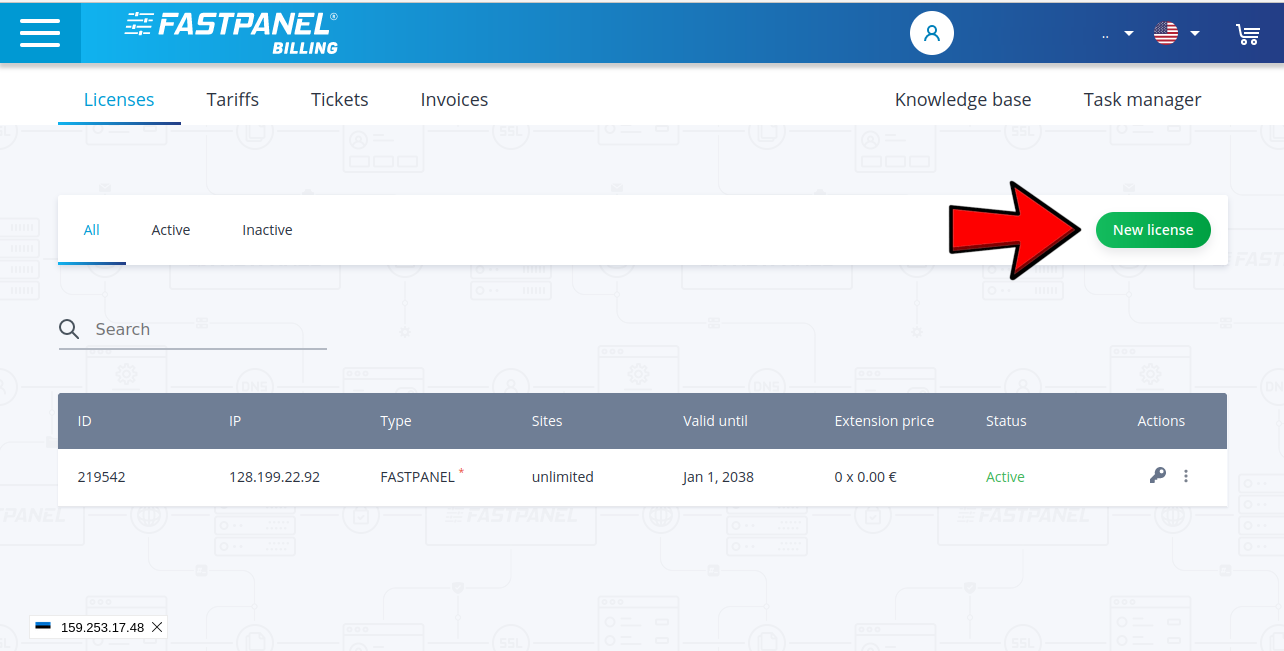
- Now click on add to cart option.
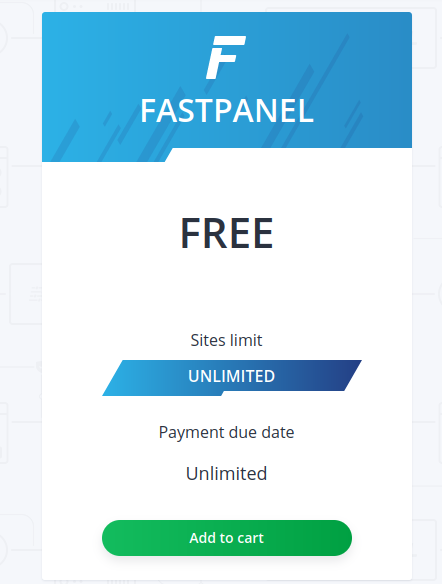
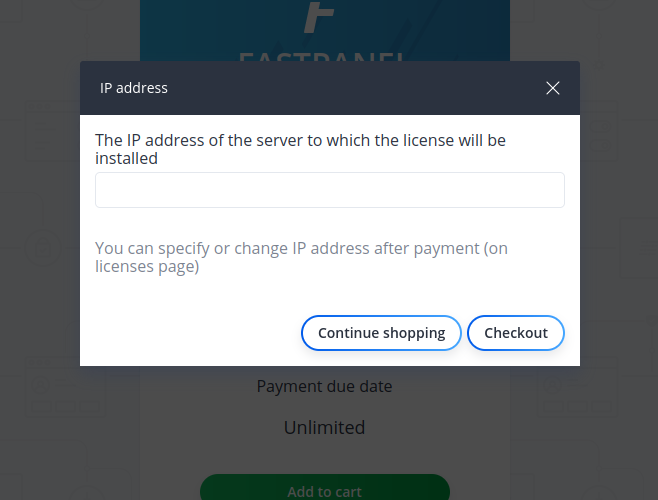
- Enter the Server’s IP address on which you want to assign the Licence, then click on
Checkoutbutton.
- A new screen will appear, then again click on the
checkoutbutton. - Now again login on the Fastpanel with the following URL.
https://Server_IP_Address:8888
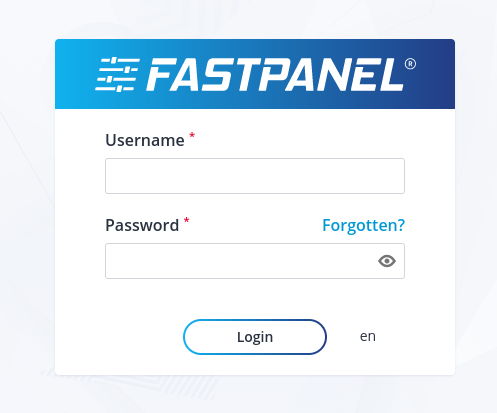
- Enter the Username and Password.
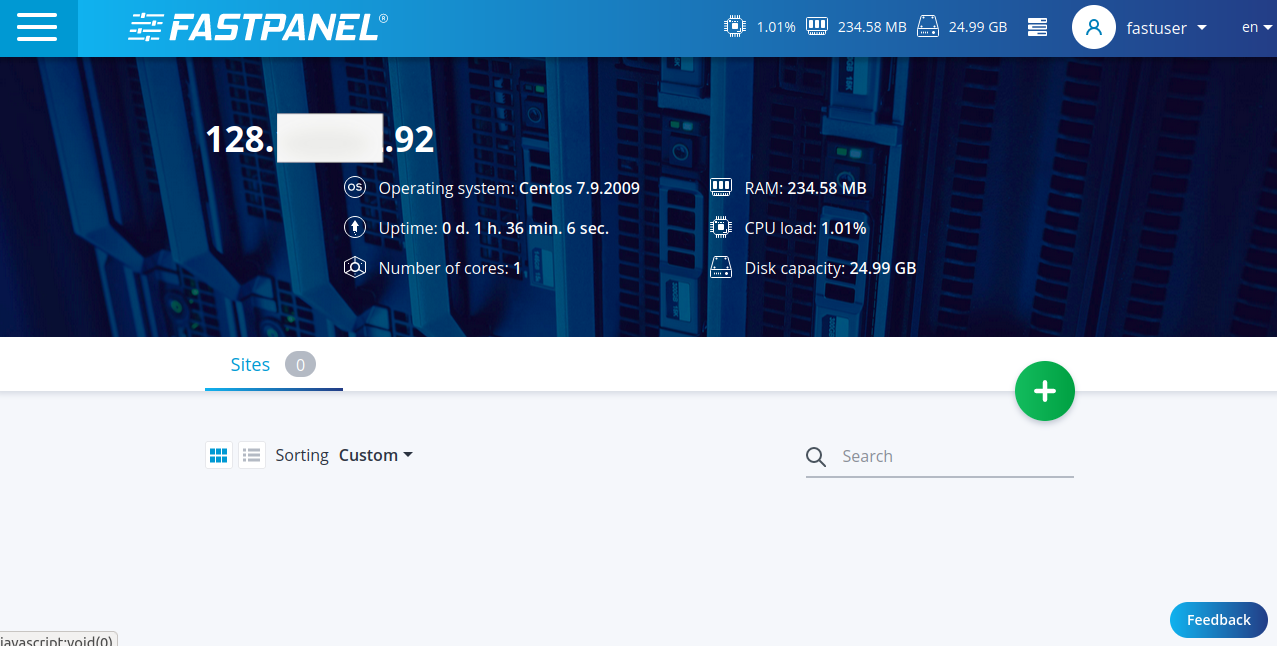
- Now we are on the Home page of the Fastpanel. You can host the new websites from here.
Conclusion
In this install Fastpanel on CentOS 7 tutorial, we have learned about the Fastpanel and how to install the Fastpanel on the Linux server. Fastpanel is one of the most used panels in the world.
If you guys have any queries related to this tutorial, let me know in the comments section.