


Introduction
In this tutorial, we will learn How To Secure Nginx with Let’s Encrypt on CentOS 8.
Let’s Encrypt is one of the most popular Certificate Authority (CA) which provides free TLS/SSL certificates for websites and applications. These certificates are used to establish the secure (encrypted HTTPS) connection between the server and the Client. We can avail of the certificate with the help of the Let’s Encrypt client, Certbot which automatically verify the Domain and issue the certificate and install them on the server.
Read Also: How to set up Nginx Server on CentOS 8
Prerequisites
Before following this tutorial, you’ll need a few things.
- Server with CentOS 8 operating system.
- Root user or Other user with sudo privileges.
- You must have a registered domain name on which we will issue the new SSL certificate, without registered domain name SSL is not possible.
- Add an A record in the DNS records of the registered domain name. Mention the Server’s IP address in the A record so the domain can point to the server. Without Domain pointing certbot can’t verify the Domain.
After completing all the prerequisites, now we can move to the installation part of the Let’s Encrypt client software.
Setup the Server
Before performing the installation we need to update the server and need to install the required packages for the server.
- Update the server packages.
yum update -y
- Install the Vim editor.
yum install vim -y
Installing the Certbot Let’s Encrypt Client
First, install the Let’s Encrypt client certbot on the server. To install the certbot on the server run the following command.
- Enable the EPEL repository on the server, just run the following command:
sudo yum install epel-release -y
- After adding the repository, install the
certbot-nginxpackage:
sudo yum install certbot-nginx -y
The Let’s Encrypt client certbot is now successfully installed and ready to use.
Setting up Nginx for Secure Nginx with CentOS
If you have not installed the Nginx package on the server simply follow the below commands, If you have already installed the Nginx then you can skip this step.
Make sure that the EPEL repository must be enabled, you can enable the EPEL repository with the help of the above commands.
- Install the Nginx Package on the Server.
sudo yum install nginx -y
- Enable the service of Nginx package.
sudo systemctl enable nginx
- Start the service of Nginx package.
sudo systemctl start nginx
- Check the status of Nginx package.
sudo systemctl status nginx
Certbot will automatically configure the SSL for Nginx, but it is required to find the correct domain configuration file. Certbot will search for Server_name which matches the Domain name for which you are requesting the certificate. If you have a fresh server with Nginx then you need to create a new configuration file for your domain, or you want just simply edit the main configuration file.
- To edit the nginx configuration file run the following command.
sudo vim /etc/nginx/nginx.conf
- Find the existing
server_nameline:
server_name _;
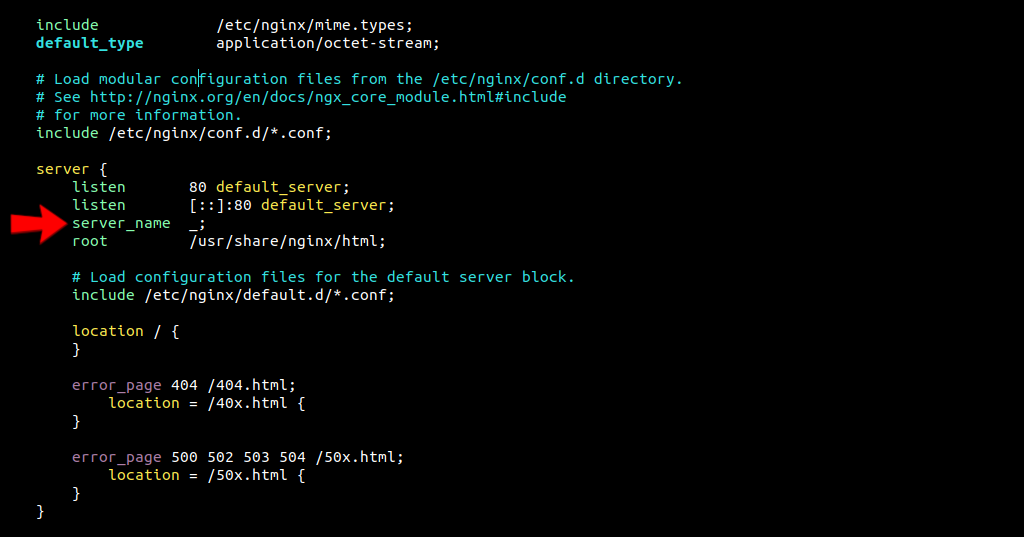
Replace the _ underscore symbol with your registered domain name on which you want to issue the SSL certificate.
server_name linuxpanda.com www.linuxpanda.com;
Save and exit from the file.
- Check the configuration is correct or not just simply run the following command.
sudo nginx -t
- If the configuration is error free then restart the Nginx service.
sudo systemctl restart nginx
Updating the Firewall
If your server has an active firewall then you have to allow ports 80 and 443 for incoming traffic. If the firewall of your server is not active then you can skip this step.
- To allow the ports run the following command.
sudo firewall-cmd --add-service=http
sudo firewall-cmd --add-service=https
sudo firewall-cmd --runtime-to-permanent
- If the firewall is running with the iptables then the command used to allow the port will highly depends on the current rule set. For the basic rules, we can use the following command to allow the ports:
sudo iptables -I INPUT -p tcp -m tcp --dport 80 -j ACCEPT
sudo iptables -I INPUT -p tcp -m tcp --dport 443 -j ACCEPT
Obtaining a Certificate
Certbot offers a wide range of ways to obtain the SSL certificate with the help of various plugins. These plugins automatically reconfigure and reload the Nginx configuration whenever requires.
- To request the TLS/SSL certificate run the following command
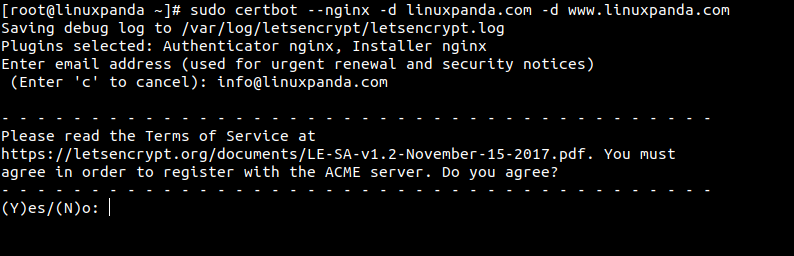
sudo certbot --nginx -d linuxpanda.com -d www.linuxpanda.com
In the above command certbot runs with the --nginx plugin and with -d the attribute we define the domains and subdomains. For each domain and subdomain, we will use a separate -d attribute.
- For the first time
certbotwill ask to enter the mail address and also ask to accept the terms and condition. Enter the mail address and enterYto accept the terms and condition.
After running the above command you will see the following output if the command runs without any error.
[root@linuxpanda ~]# sudo certbot --nginx -d linuxpanda.com
Saving debug log to /var/log/letsencrypt/letsencrypt.log
Plugins selected: Authenticator nginx, Installer nginx
Requesting a certificate for linuxpanda.com
Performing the following challenges:
http-01 challenge for linuxpanda.com
Waiting for verification...
Cleaning up challenges
Deploying Certificate to VirtualHost /etc/nginx/nginx.conf
Redirecting all traffic on port 80 to ssl in /etc/nginx/nginx.conf

- - - - - - - - - - - - - - - - - - - - - - - - - - - - - - - - - - - - - - - -
Congratulations! You have successfully enabled https://www.linuxpanda.com
- - - - - - - - - - - - - - - - - - - - - - - - - - - - - - - - - - - - - - - -

IMPORTANT NOTES:
 - Congratulations! Your certificate and chain have been saved at:
   /etc/letsencrypt/live/linuxpanda.com/fullchain.pem
   Your key file has been saved at:
   /etc/letsencrypt/live/linuxpanda.com/privkey.pem
   Your certificate will expire on 2021-07-23. To obtain a new or
   tweaked version of this certificate in the future, simply run
   certbot again with the "certonly" option. To non-interactively
   renew *all* of your certificates, run "certbot renew"
 - If you like Certbot, please consider supporting our work by:

   Donating to ISRG / Let's Encrypt:   https://letsencrypt.org/donate
   Donating to EFF:                    https://eff.org/donate-le
The TLS/SSL certificate is successfully downloaded, installed, and configured on the server. To test them simply open the browser and enter your domain with https:// in the URL section.

Step 6 — Setting Up Auto Renewal
Lets’s Encrypt certificates are only valid for 90 days, after that, we need to renew the SSL certificate. We can also set an auto-renewal for the SSL certificate. We need to setup a cron that runs just before the expiry date of the SSL.
- To setup a cron simply, first open the
crontabfile.
sudo crontab -e
- Add the following line at the end of the
crontabfile then save and exit from the file.
0 0 1 2,4,8,10,12 * /usr/bin/certbot renew --quiet
The 0 0 1 2,4,8,10,12 * means that the renew command will run at 00:00 on the 1st of every 2nd month and --quiet the attribute is used to tell the Certbot not to show output information or wait for any type of user input.
The renew command check all the existing certificates and issue them a new certificate every second month.
Conclusion
In this Secure Nginx with CentOS tutorial, we have learned how to install the Certbot and obtain a TLS/SSL certificate with the help of the Let’s Encrypt client certbot, configure it with an Nginx web server, and also setup an autorenewal for the SSL certificates. If you want to read a brief explanation about the Certbot click here.
If you guys face any problems, then mention your problems and queries in the comment section.