


In this tutorial, we will see how to Configure DNS Server On Ubuntu with the help of the BIND package in Ubuntu 20.04 which can be used by the server to resolve the private hostname and private IP addresses.
DNS is an essential part of server management. DNS stands for (Domain Name System) is used to resolve the IP address of the server from the Fully Qualified Domain Names (FQDNs) name to show the contents of the website. Creating a private DNS server is a very efficient option for the private network to improve the management of the servers.
Prerequisites
- Need a fresh Ubuntu 20.04 server to serve as the Primary DNS server.
- You can use multiple servers to handle various nameservers (ns1, ns2).
- DNS clients that will connect to your DNS servers.
Set Up the Bind on the Server
- Update server.
sudo apt-get update
- Install the Bind package on the server.
sudo apt-get install bind9 bind9utils
- Start the Named Service.
systemctl start named
- Enable the Named Service.
systemctl enable named
- Status of Named Service.
systemctl status named
- If the FIrewall is in the active state then we need to allow the Named port with the following command.
sudo ufw allow 53
- Change the current working.
cd /etc/bind/
- Copy the default configuration file
cp named.conf named.conf.new
Edit and Create the zones in DNS configurations
vim named.conf
Enter the Zone details. You can copy the Zone structure from the named.conf.default-zones file. You Can create multiple Zone (Forward, Reverse, etc.) as per your requirement.
Here, we have created the Forward Zone.
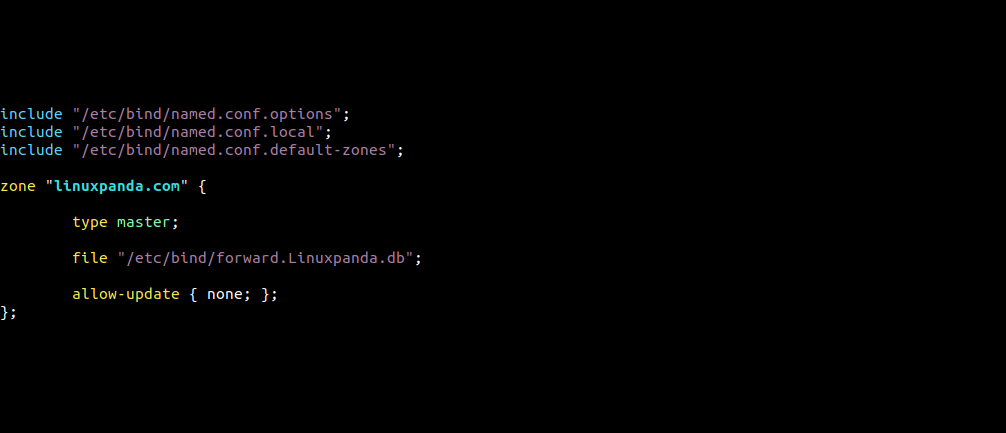
Replace the Linuxpanda.com with your Domain Name and define the path of the Forward Zone File.
Save and Exit the DNS configuration file.
- Copy the Default Zone file and rename with the Name you mentioned in your DNS configuration file.
cp db.0 forward.Linuxpanda.db
- Edit the
forward.Linuxpanda.dbfile and add the DNS details in it.
vim forward.Linuxpanda.db
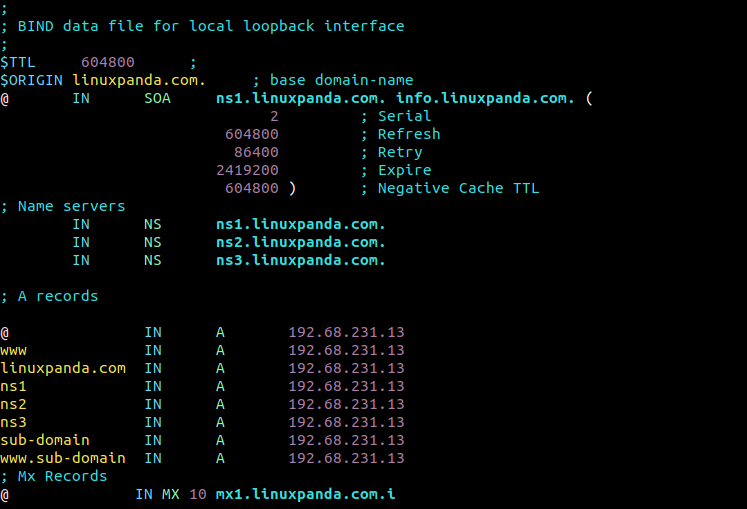
You can copy these details and make the changes as per your requirement.
Nameserver – The most important thing in DNS is Nameserver, without a nameserver Domain will not able to resolve any IP address. So carefully create the nameserver. In the above picture, we have created 3 Nameservers. Generally, only two Nameservers are required but if we use more Nameserver as per our requirement
A Record – It is a type of DNS record. It contains the IP address of the server. All the Domains and Sub-Domain have A record, without A the record we can’t access the contents of Domain. It is not required that all the Domain and Sub-Domain have to be hosted on the same server, you can host the Domain and Sub-Domain on two different servers. Just simply create a new entry in A record in the Main Domain and mention the IP address of the Sub-Domain in the A record.
MX Record – It is a type of DNS record. It contains the records related to mails. To access the Mail service Domain must have an MX record in DNS records, without MX records Domain not be able to use the mail service.
- Save and Exit the Zone file.
- Restart the Named Service
systemctl restart named
Connect your Domain (GoDaddy) to the Private DNS server
- Login into the GoDaddy with your Username and Password.
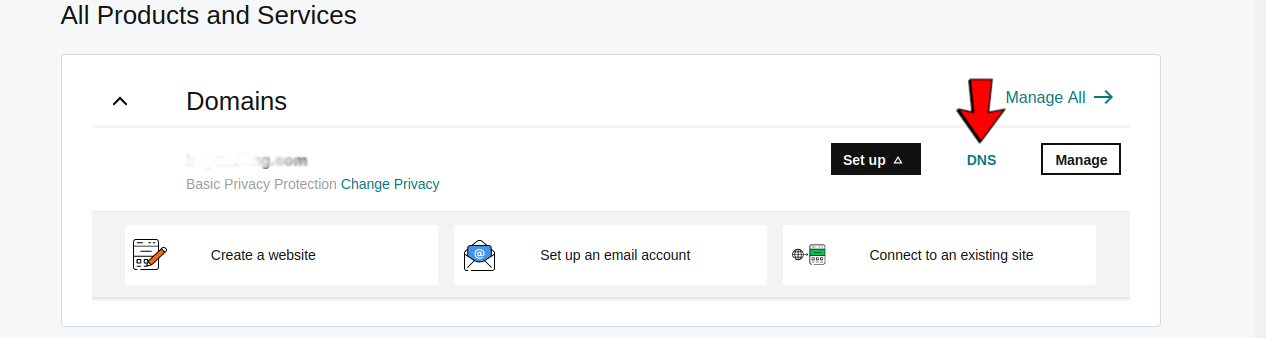
- Select the Domain and Click on DNS
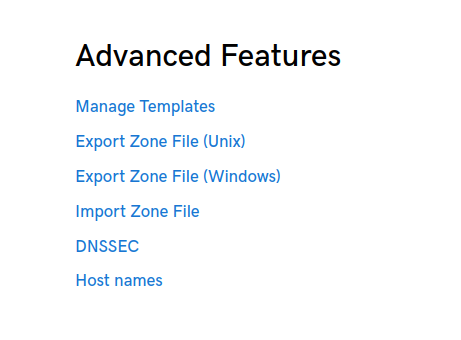
- Select the Host names under the Advanced Features Section.
- Click on
Add.

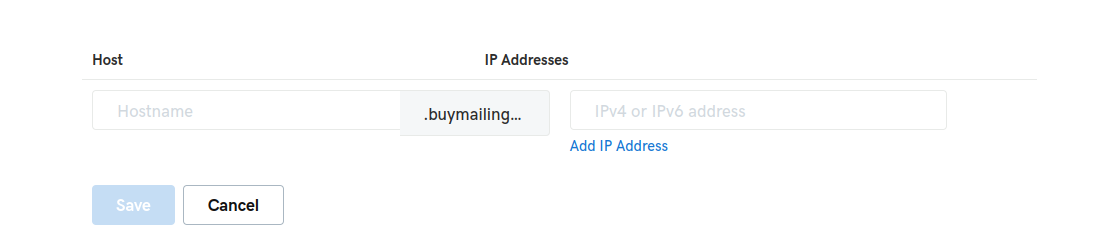
- Enter the Host(ns1, ns2 etc) and IP(192.168.255.255) address of the server where you setup the private DNS server.
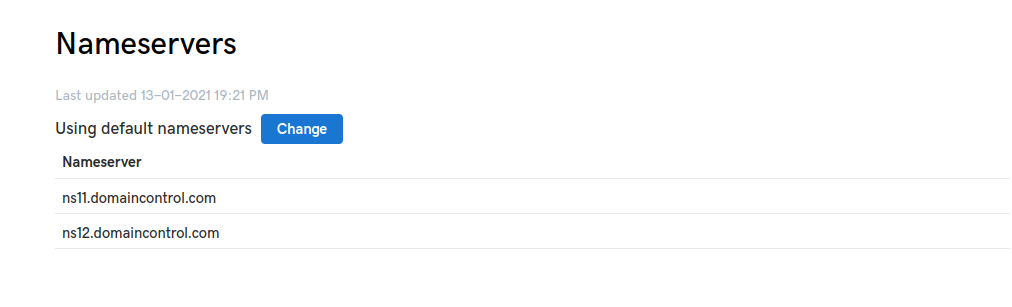
- Now, we have to add the Nameserver. Click on
Change
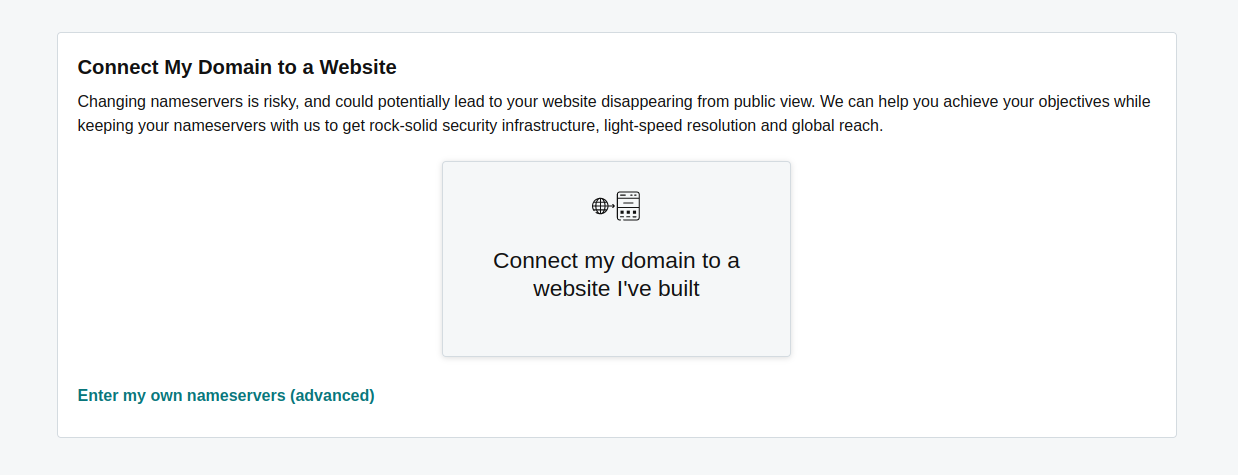
- Click on
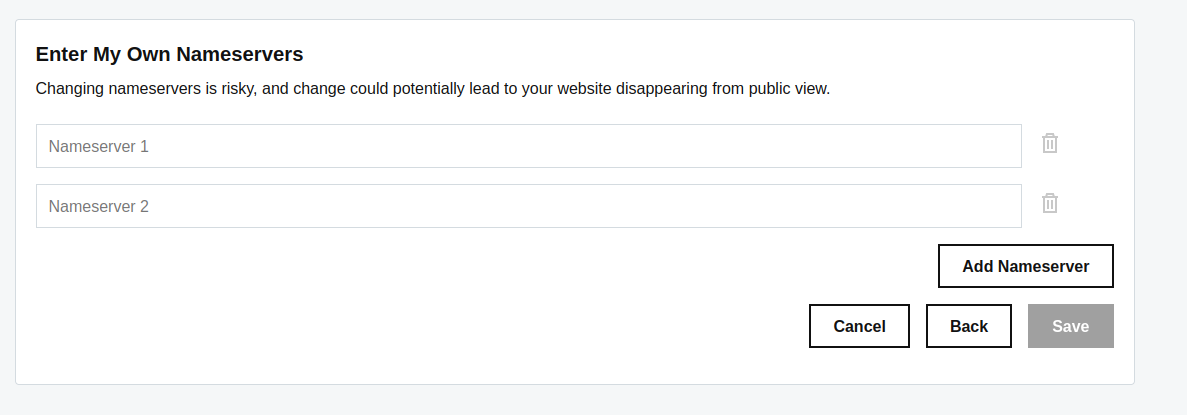
Enter my own nameservers
- Enter the new Nameserver’s details then click on
Save.
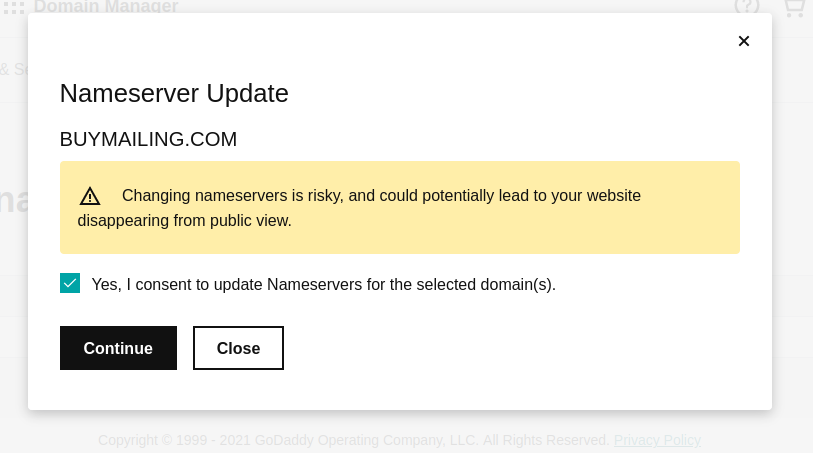
- After adding the Nameserver’s details, you will be a Dialog Box as shown below. Click on
ContinueButton.
You have successfully setup the Private DNS server and now, the Domain will use the private DNS server to resolve the IP address.
You can use intoDNS to check the Nameservers and IP addresses. With the help of this tool, you can cross-check whether the Private DNS server is successfully working or not.
Read also:
How to set up Nginx Server on CentOS 8
How to Add and Delete Users on CentOS 8
Conclusion
In this tutorial, we have learned how to create and configure a Private DNS server with the help of the Bind package. We also learned how to connect the Domain to the server.
If you guys have any queries related to this Configure DNS Server On Ubuntu tutorial, Let me know in the comments.