


About Virtualmin
Virtualmin is an open-source control panel. It supports CentOS 8 and provides quite an easy GUI to manage servers, either VPS or dedicated. We will be able to manage various services like Apache, Nginx as web-servers, multiple PHP versions. Also, some other services like Postfix, Dovecot, DNS, MySQL, FTP, SSH, Email users, and many other services. Install Virtualmin on Centos 8.
It provides one-click installation scripts like Roundcube, PhpMyAdmin, WordPress, and Django. It also has let’s encrypt SSL. That we can use to configure one-click SSL on any hosted domain or Virtualmin control panel.
Also Read: How to install Fastpanel on CentOS 7
In this article, we will install the Free version (GPL) of Virtualmin on a fresh server with Centos 8 operating system.
Prerequisites
- It’s highly recommend to use a fresh server to avoid any conflicts and errors, So this article is totally based on freshly installed CentOS 8 Server.
- Server should be set with fully qualified domain name as hostname, for example ‘server.linuxpanda.com’. if it’s not please follow the steps, below you will find the how to set hostname on CentOS 8 for virtualmin.
- If Server RAM is less than 2 GB then it’s recommended to keep the Virus scanner disable.
Login as Root
Use the IP address of the server and use the SSH to log in as root access.
ssh [email protected]
Set FQDN Hostname for Install Virtualmin on Centos 8
Before moving forward on the setup, We need to set a fully qualified domain name hostname. Use the below command to set the hostname.
hostnamectl set-hostname server.example.net
Check if it is ok by running the below command.
hostname -f
Update or Install Few Packages
Fresh Server might have some pending updates, So let’s install the epel repository and update the packages first by using the below commands.
dnf install epel-release -y
dns update -y
We need to install a few packages to install the commands, Which is useful further to download the script.
dnf install wget screen vim curl -y
Downloading the Virtualmin Script
Virtualmin provides a complete installation script that allows us to install it with a few commands. The following command downloads the script into the root directory.
wget http://software.virtualmin.com/gpl/scripts/install.sh -O /root/virtualmin-install.sh
You will get the output something like this when it’s downloaded:
2020-08-05 12:57:56 (198 KB/s) - ‘/root/virtualmin-install.sh’ saved [32168/32168]
Start the Installation
Now we need to run the script that we just downloaded.
sh /root/virtualmin-install.sh
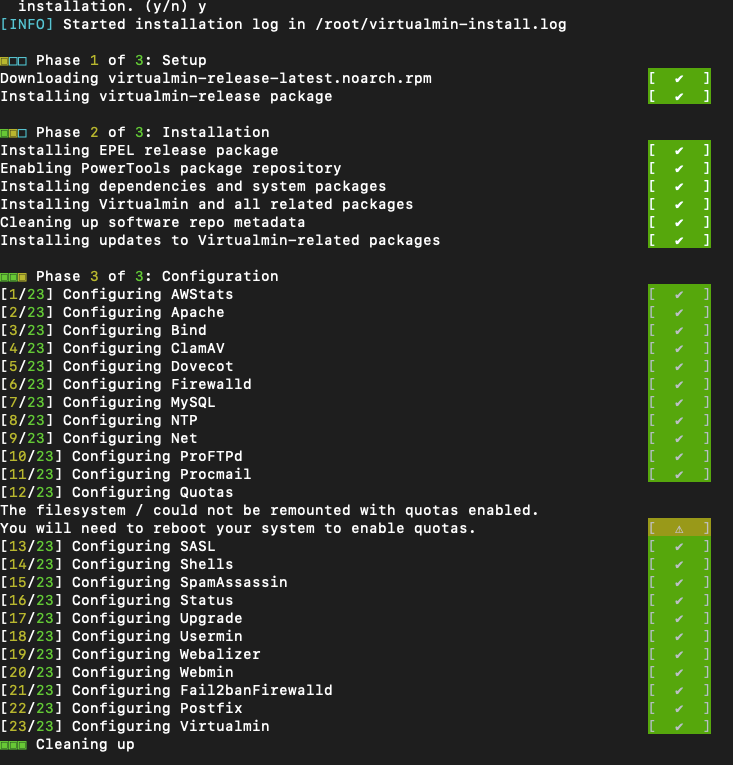
This will initiate the installation process. It will begin with a small disclaimer, after accepting it the installation process will start.
The installation process goes through three phases.
1. Setup
2. Installation
3. Configuration
Accessing Virtualmin
At the end of the process, you will see the last line like below with your server IP and server hostname.
[SUCCESS] Installation Complete!
[SUCCESS] If there were no errors above, Virtualmin should be ready
[SUCCESS] to configure at https://server.example.net:10000 (or https://192.168.1.100:10000).
[SUCCESS] You'll receive a security warning in your browser on your first visit.
So as in the above lines you can see the URL to access the Virtualmin. Now we just need to hit this below URL to the browser.
https://server.example.net:10000
or
https://192.168.1.100:10000
It will give you unsecure SSL Warning that you can ignore and continue unsecure. Then it will ask for a username and password, so use the root login that we used to log in on SSH.
Firefox > It will give you option to continue with unsecure link.
Chrome > This browser will not give you any link like before to continue. so just type “thisisunsafe” on the screen. that will not be visible to just type and it will allow you to access the URL.
Post-Installation Wizard
Once you will be logged in with the details, you will see the Post-Installation Wizard, follow the wizard options. mostly you don’t have to do change anything as Virtualmin quite understand the server resources and automatically choose the best option by default so you need to click on the Next button.
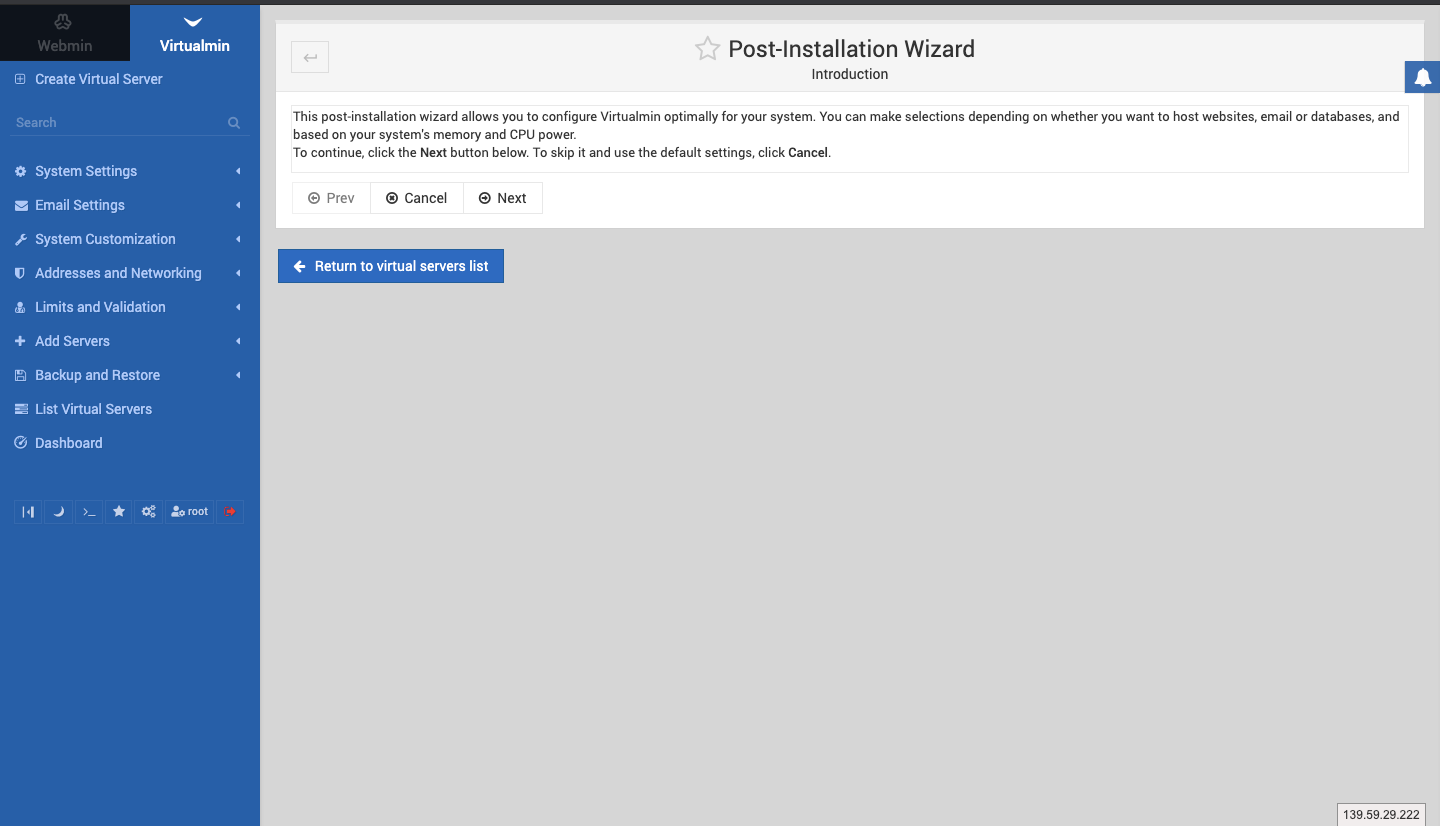
- Introduction:- Describes that wizard is based on cpu and memory optimisation.
- Memory Use:- You will asked to Preload Virtualmin libraries? and Run email domain lookup server?
- Virus Scanning:- To prevent from malicious malware it gives us option to enable the clamAV but it consume RAM so it’s on you if you want this enable. it’s not recommended to enable this only your server RAM is above 2GB otherwise it will give you error at the end.
- Spam filtering:- Email filtering either incoming or outgoing so will ask if you want to run SpamAssassin filter.
- Database Servers:- Choose if you want MariaDB/MySQL or PostgreSQL or both of them.
- Database Password:- Setup Database server root password.
- MariaDB/MySQL database size:- Select the RECOMMENDED option and click next.
- DNS configuration:- Set Primary & Secondary Nameservers for your domain.
- Password storage:- How you want to keep your password plain text or hashed.
Above are the Option in Post-Installation Wizard above I have explained in a very short text, you will find more information while doing completing the wizard so I recommended you to read those properly for more information.
Next, we are ready to host our domain but before that let’s understand the options and make a few changes.
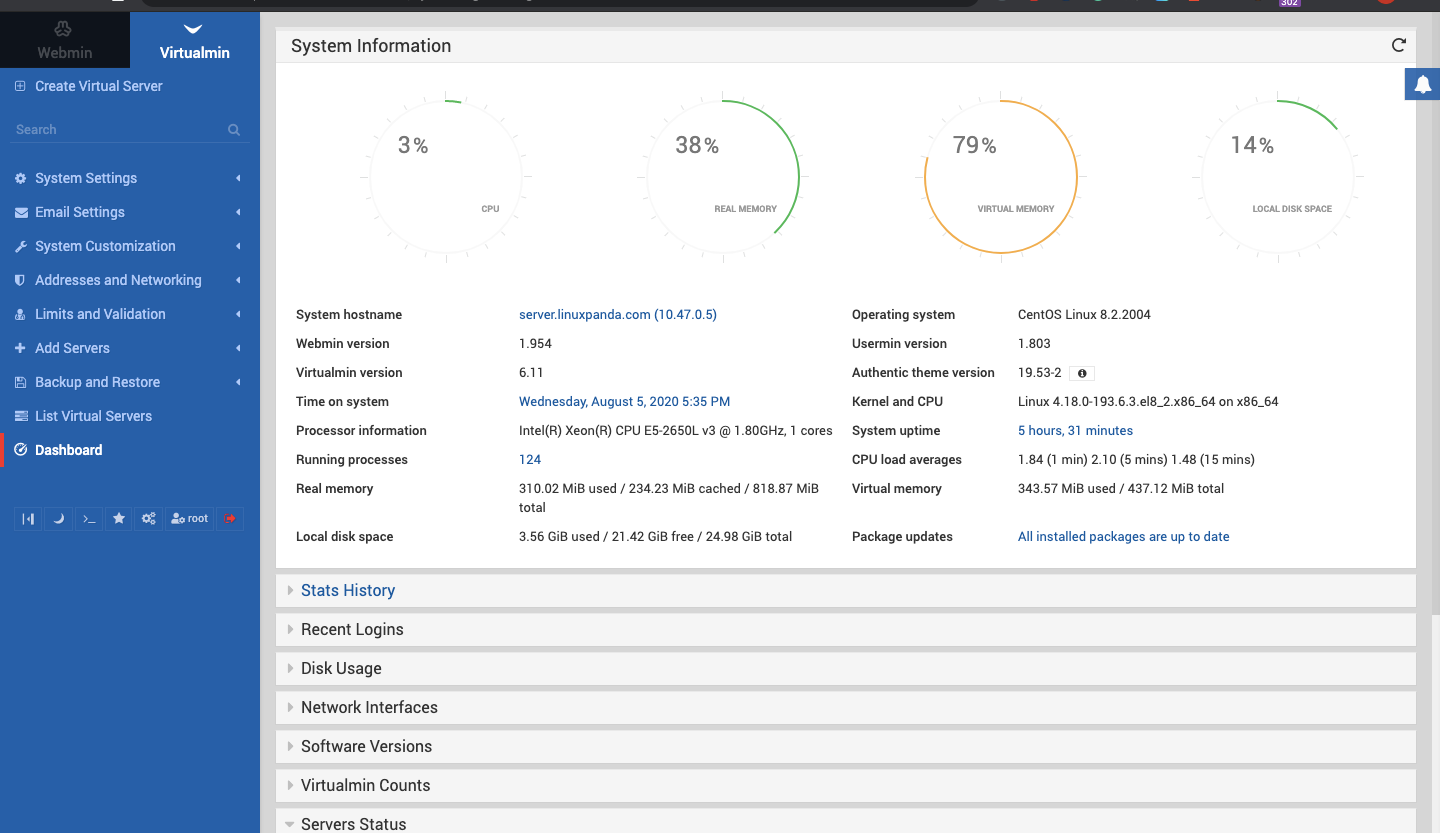
Understanding the Virtualmin
After we complete the post-installation wizard we will be able to Virtualmin dashboard, it will show you all system-related information like CPU, RAM, Disk usages, and more information.
Firstly, a Small change in the default plan as it has a quota limit of only 1GB creates issues later and makes the website inaccessible due to quota full, so follow the steps below.
System settings > Account Plans > Default plan
increase or choose unlimited for Quota for entire server and Quota for server administrator user both options.
Virtualmin Terminology
Virtual Server:- Virtual Server means domain that we need to host on this server. in simple words, you can translate this option as “Create an account” or “Host a domain”.
Sub-Server
On Virtualmin, the sub-server represents a subdomain.
Difference between Webmin or Virtualmin
Webmin is a separate control panel it’s a base for Virtualmin. You can say Virtualmin is an extension of webmin that enhances the functionality to control the virtual servers. With some additional features and eliminate or reduce the command-line interaction.
Webmin have complete core services, And configuration directly, we can handle servers from the Webmin panel.
Virtualmin is using all those services and providing us a combined package to host a website that includes all the services. Like webserver, database, email services, and others.
Hosting a Domain and Subdomain
We have done with the installation and setup, now we need to focus on hosting the domain on Virtualmin. let’s start from the left side menu you can see the option “Create Virtual Server” Click on that.
Fill in the information like domain name, description, and password (use a strong password). And choose server template and account plan as for now there will be only default. “Server template” and “Account plans” option is in the left side menu “System Settings” option.
Now expend the Enabled features you will see the options that will be available with this virtual server. You can uncheck the option you don’t want. For example, if you just need a WordPress website only and nothing related to emails and DNS, You can uncheck “Accept mail for a domain?”, “Setup spam filtering?” and “Setup DNS zone?”
We use the host domain name example.net in this article. And keep the “Administration username” default that is automatic. The username “example” will be automatically created on the server, associated with this virtual server. This “example” user is fully authorized to handle this virtual server and its function.
You don’t need to remember the password for this user. If you are the admin and managing further yourself. But if you are creating a domain for someone else and want to give him access, then note the password.
Creating Subdomain
The main domain has been added, let’s see how we can add a subdomain on Virtualmin, So just again click on the “Create Virtual Server” option, you will see some options at the top bar with these options: “Top-level server”, “Sub-server” and two more.
Here “Top-level server” means New Virtual Server same as example.net with giving a domain, “Sub-server” means subdomain.
As we need to click on “Sub-server” and it will ask for a domain name, mention the subdomain for example.net like “sub.example.net” again check the options by expending choose correct config and click on “Create Server”.
Now you will see two domains in the dropdown. Just after Virtualmin in the left upper corner and by default now “sub.example.net” is selected.
Understanding FTP and Email Users
We Always need FTP and Email users. So first, make sure you have selected the correct domain on which you need to create an FTP user. Options will be the same for both the main domain and subdomain.
Click on “Edit Users“. you will see three options on top to create users for FTP and Email:
- Add a user to this server:- Use this option when you need to create an email account to send receive the mails.
- Batch Create user:- This option allow us to create multiple users at once either email or FTP, just you need to understand the syntax properly.
- Add a website FTP access user:- Allow us to create FTP user for domain directory so Developers can access the applications files.
Click on the option as per the requirement of the user and fill the form with user and password and click on “Create”, And it’s done.
Setup Databases
The next important points come from the database and PhpMyAdmin. This is required for almost every website. So start by clicking on “Edit Databases” on the left side menu also make sure you have selected the proper domain.
You will find the option on the top bar as follow:
- Databases:- All the related databases and option to create new database.
- Passwords:- You can change password from here. If you want to keep a different password otherwise it’s same password as we choose while creating virtual server
- Import Database:- This will allow you to any existing database under ownership of the current select virtual server.
- Remote Hosts:- You can allow any remote client ip’s who wants to establish the communication with database from their system.
- MySQL Server Host:- it allow you to select other mysql server if those are added already from Mysql Servers page.
You will see a database same name as a Virtual server or subdomain depending on which domain you have selected. So those are empty and default created databases and can be used directly with the application. You can create another new database by clicking on “Create a new database”.
You will see the “Manage” option that will tell you about the database. If it has tables and also gives you options to “Create a new table”, “Create View”, “Drop Database”, “Backup Database”, “Execute SQL”.
Install PhpMyAdmin
It’s important to have GUI access to the Database, and we can achieve that by installing PHPMyAdmin. It is a well-known open-source tool to connect with MySQL server and handle it Graphically.
To install click on “Install Scripts“, here you will see available scripts and we have quite other options too like Roundcube, Django, phpPgAdmin, WHMCS, WordPress, and Of Course phpMyAdmin, so select the “phpMyAdmin“, Click on “Show Install Options“, after that you will see some options make changes accordingly and click on “Install Now“, it will be installed and you will get access link with username and password at very last line.
Conclusion
We have gone through the Virtualmin installation and configuration part. As we have seen, It’s pretty easy to handle the server with a control panel. So far we only used some features and understood a part of Virtualmin. It is quite a rich-featured panel with various options that we will look into it later in a separate blog. I will try to write about other features in coming blogs. You will learn how to install Virtualmin on CentOS 8.
leave a comment if any part is not clear or you are getting any issues while following this article.